GMOD
GMOD Cloud Tutorial
See also the AWS walkthrough, a screenshot guide to registering with Amazon Web Services, setting up a GMOD in the Cloud instance, connecting to it using SSH, and shutting down.
Contents
- 1 Amazon Web Services
- 2 Amazon Web Services: Registration
- 3 Credit Where Credit’s Due
- 4 Finding and Starting a GMOD Cloud AMI
- 5 Interacting with the Server
- 6 Working with the GMOD Software on the Server
- 7 Leaving the Cloud
Amazon Web Services
Amazon has a set of guides for getting started with Amazon Web Services. At a minimum, we recommend reading Getting Started with AWS and Getting Started with AWS Free Usage Tier.
You will need to create an AWS account, regardless of whether you already have an Amazon account. The following screenshots take you through the registration process step by step.
Amazon Web Services: Registration
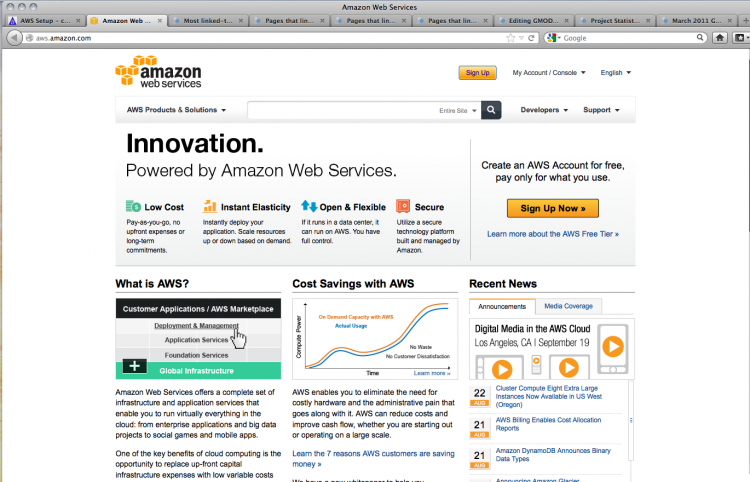
Start off at aws.amazon.com
Log in with your regular Amazon account (if you don’t have an Amazon account, you’ll need to create one)
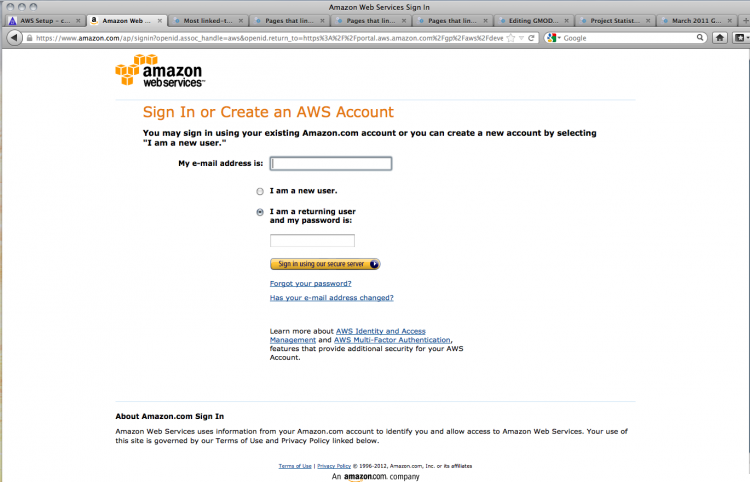
Theoretically Amazon already knows this stuff, but you have to enter it all again…

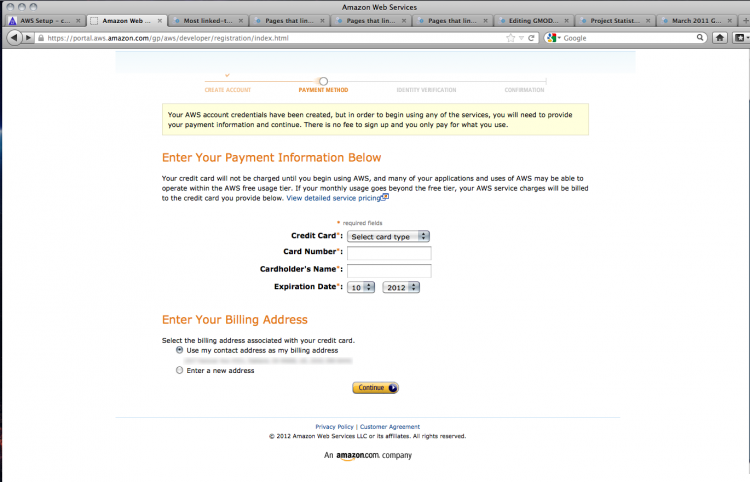
You’ll need to enter your credit card information to pay for your cloud usage; GMOD has a grant from AWS to allow users a certain amount of compute credit.
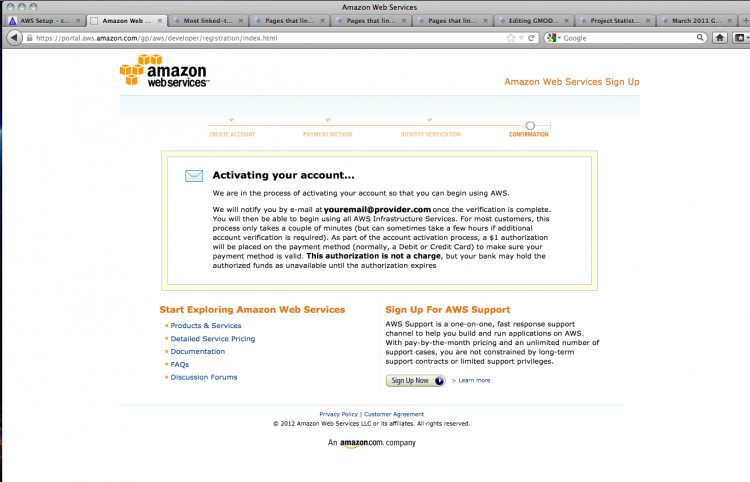
Amazon’s billing system requires phone verification. Once you have done this, you’ll get this confirmation screen:
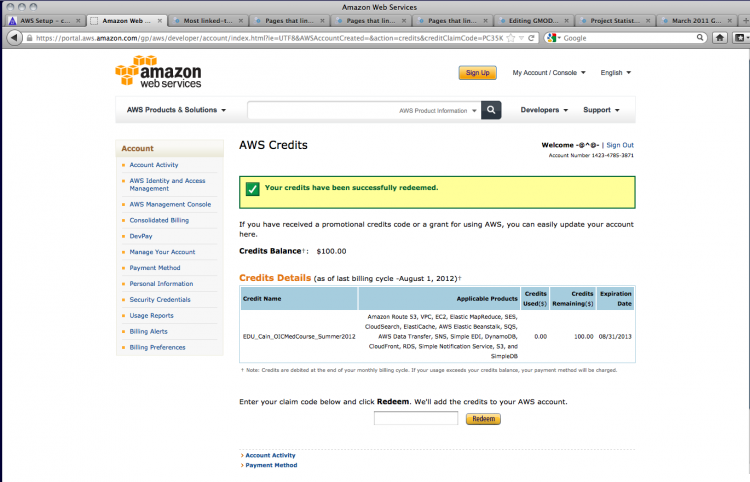
Credit Where Credit’s Due
If you have a voucher for free compute credit, you can apply it at http://aws.amazon.com/awscredits.
Finding and Starting a GMOD Cloud AMI
The next job is to find and launch a GMOD in the Cloud instance. The current GMOD in the Cloud instance is as follows:
- Amazon AMI ID: ami-a9d7f9c0 (in the US East-Virgina zone);
- Name: GMOD in the Cloud 2.05
(as of December 16, 2013)
Read on for text instructions, skip down to the screenshot guide, or skip to the next section.
To find it in Amazon’s management page, go to AMIs section under Images in the EC2 Management Console. Search public images for that ID or “GMOD in the Cloud” and right or control click on the most recent version. This will bring up a menu; select launch image from this menu. You will be presented with a pop up window to configure the image. You can accept all of the defaults unless you really want a more powerful machine. If not, select the “micro” instance, which, if you don’t have any other micro instances available, and you’re still new to AWS, will be free for a year. For a more powerful machine, select something else. Press continue.
In the next window, you should be able to accept all of the defaults. Press continue.
In the next window, you might want to give your instance a name so you can easily identify it later. You could try something like “first GMOD in the Cloud instance”. Press continue.
In the next window, you are asked to provide or create a key pair so that you may remotely log in. If you don’t already have one, select Create key pair. Give it a name and down load the key pair. Remember where you downloaded it to, because you’ll need it later to log into your machine. Press continue.
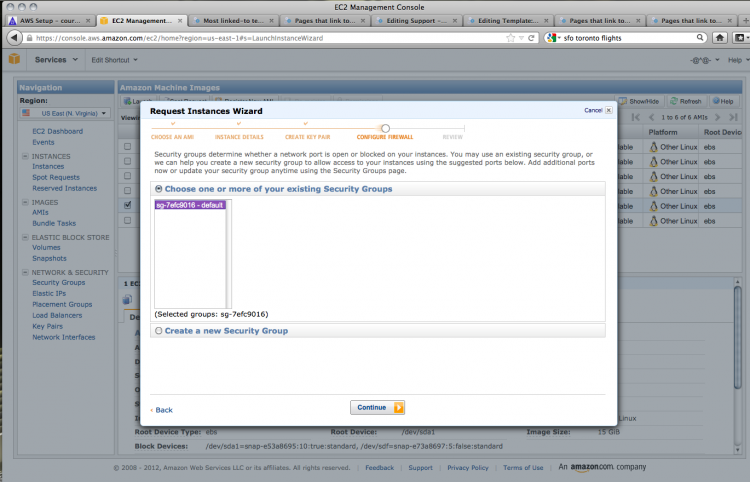
Next you’ll be asked to configure the firewall. You’ll need access on ports 22 (ssh) and 80 (http) If there is a “default” option, you can probably accept it. If not, select Create new security group and select SSH and HTTP from the drop down list, clicking “add rule” for each. Give it a useful name like “default”. Press continue and close until your instance gets created.
Launch an Instance
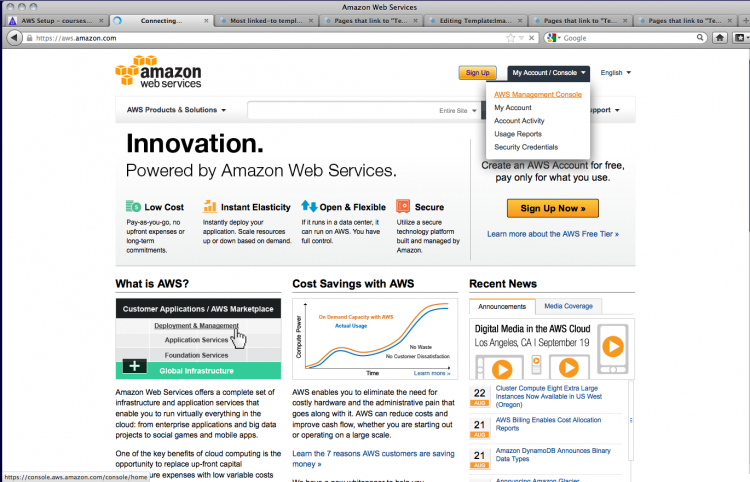
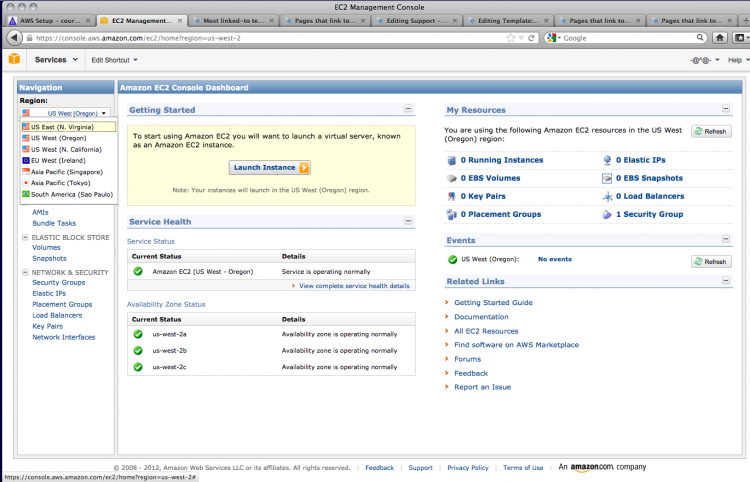
Return to the AWS home page (confusingly, the “sign up” link is still present and there’s no indication that you’re logged in). Select the AWS Management Console link under My Account/Console.
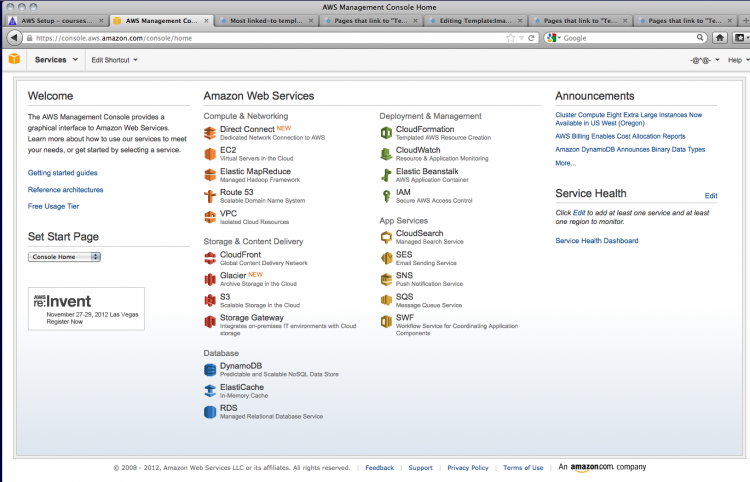
This takes you to the console. Click on EC2 to access cloud computing services.
At present, GMOD in the Cloud 1.3 is only available in the US East area. You may need to change the setting in the Navigation section on the left.
Once you have set the region, you can search for the AMI you want.
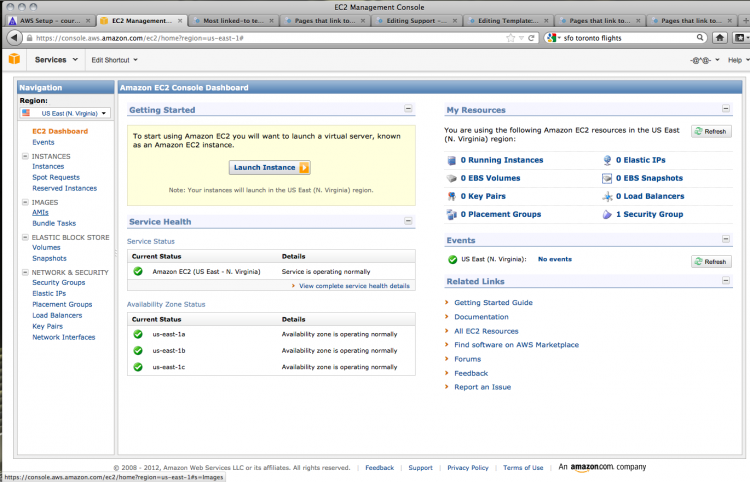
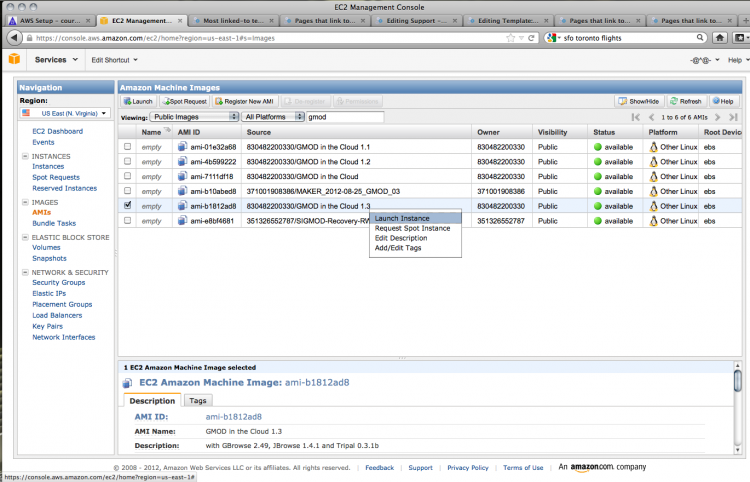
Click on AMIs in the left-hand menu to view or search for Amazon Machine Images, AMIs. You can find the GMOD image by searching public images.
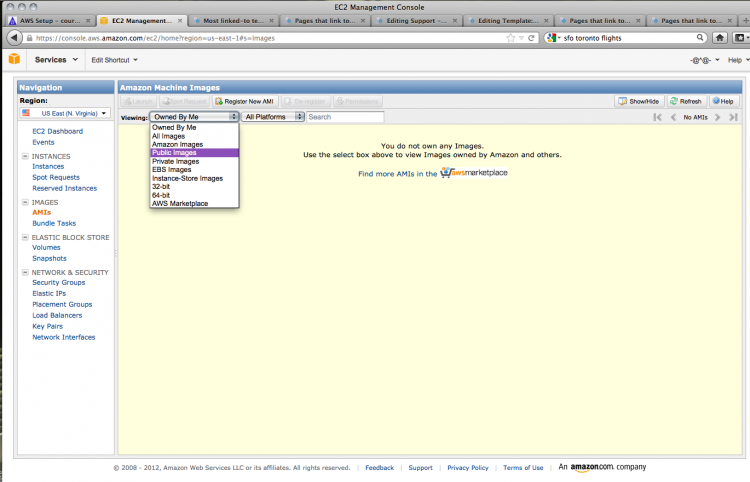
A search for gmod brings up a number of AMIs; choose the most recent GMOD in the Cloud image (1.3 as of August 2012).
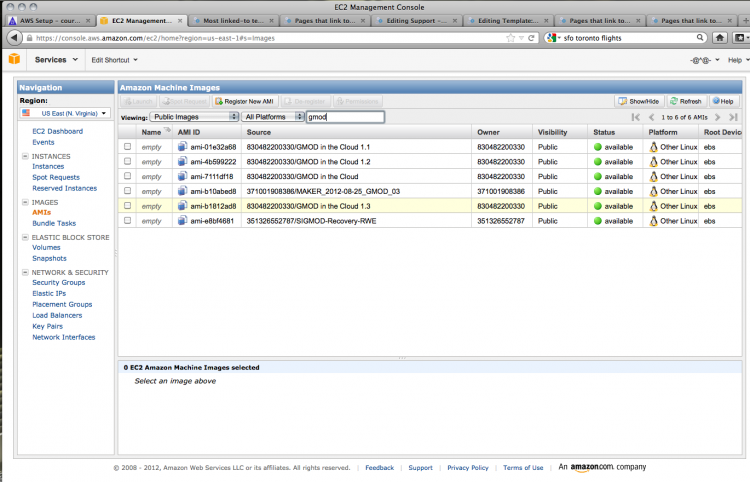
Right-clicking on the AMI of your choice brings up a contextual menu; choose Launch Instance to create your instance.
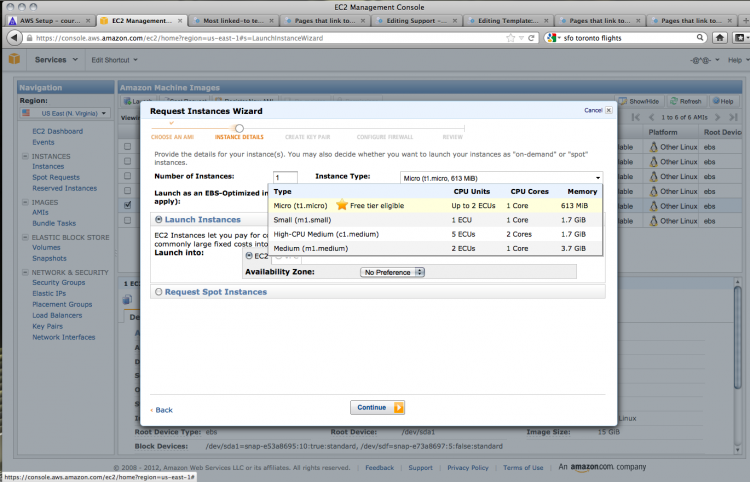
There are a number of options for your instance. You can choose the capabilities of your cloud computer; in this case, only the lowest spec computer is available for users of the free services. The defaults are fine for our purposes.
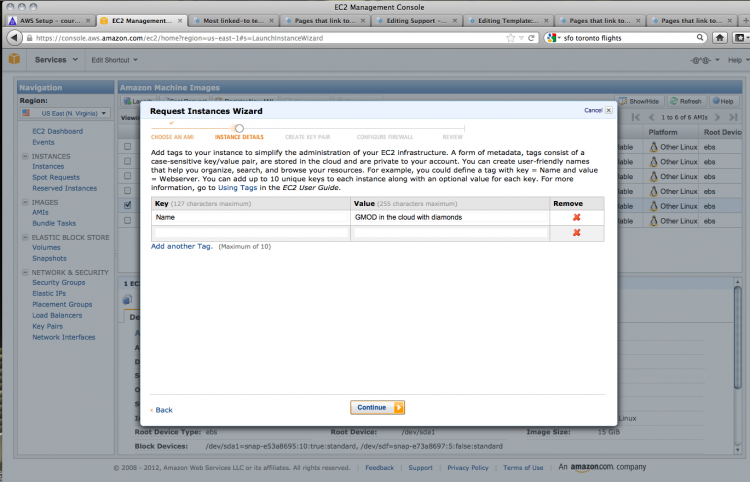
You can add information for your instance in the form of key-value pairs. Give your instance a name by adding ‘Name’ to the key field and an appropriate name in the value field.
To be able to access your AMI, you’ll need to create a key pair. Choose a key word and Amazon will generate a private key for you.
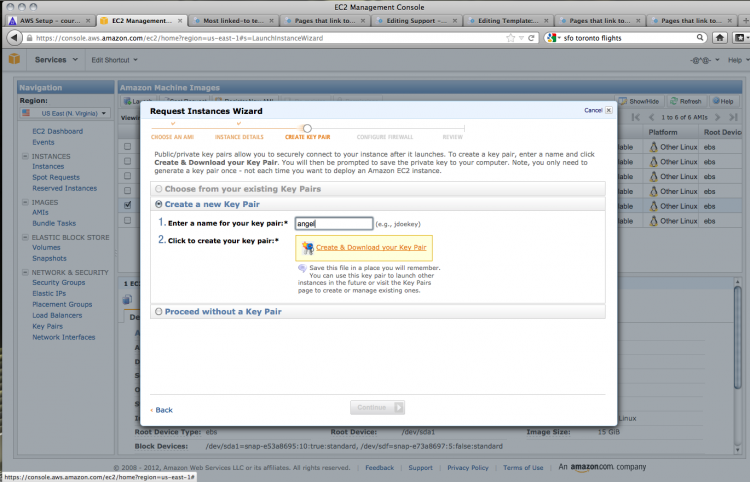
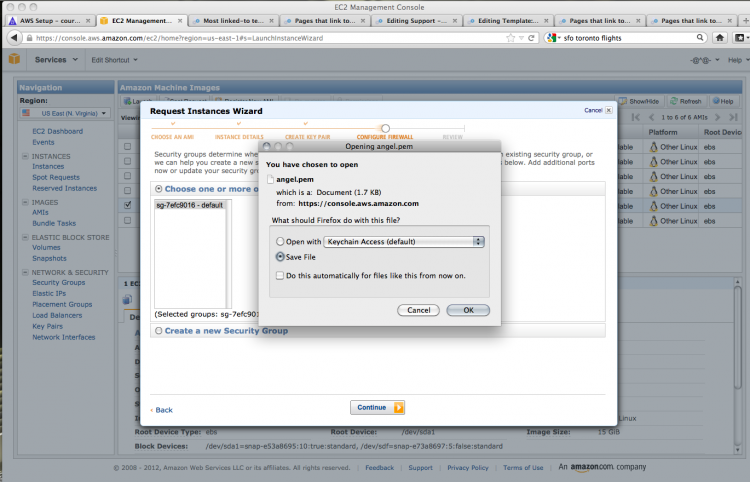
Save this to disk for later use.
You can now configure the security options for your instance. These settings will allow you to access the AMI using various protocols.
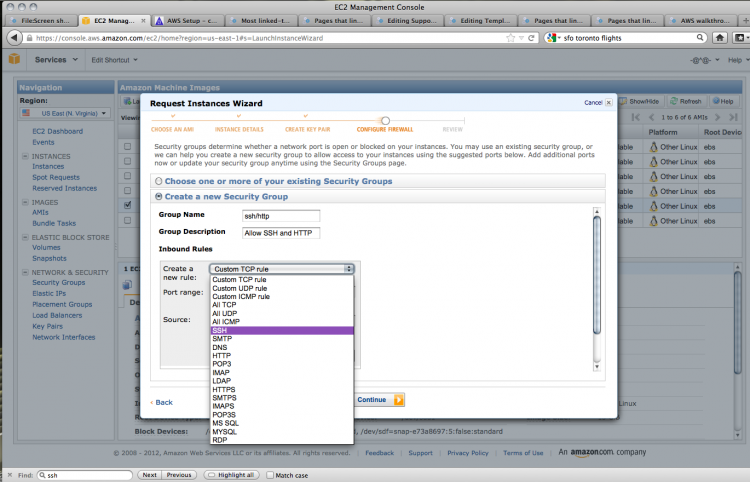
The default settings do not allow any access, but we want to use SSH (secure shell) and HTTP (standard browser-based web protocol) to get into our instance. To do this, create a new security group; give it a name and a description.
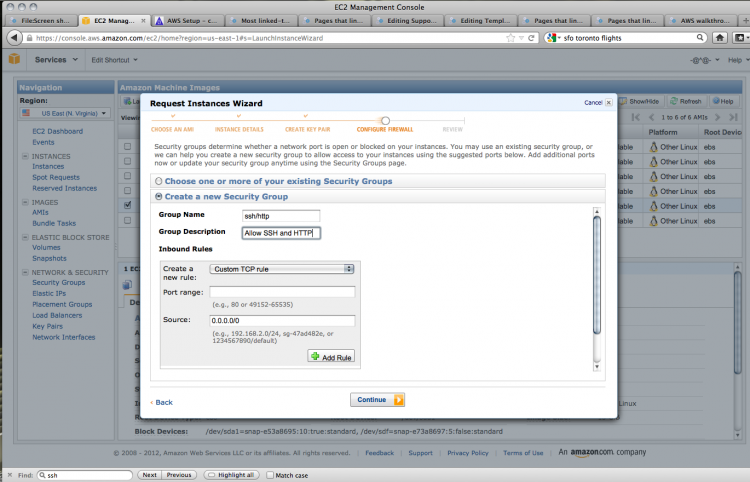
You can then add the two kinds of connections that we want to allow. Choose SSH from the drop-down menu. The source field dictates the IP addresses that can contact the instance using SSH. Unless you need to restrict access to certain IP addresses, this can be left as is.
Use Add rule to create another rule for HTTP access. Once again, choose HTTP from the drop-down menu and leave the source field as it is.
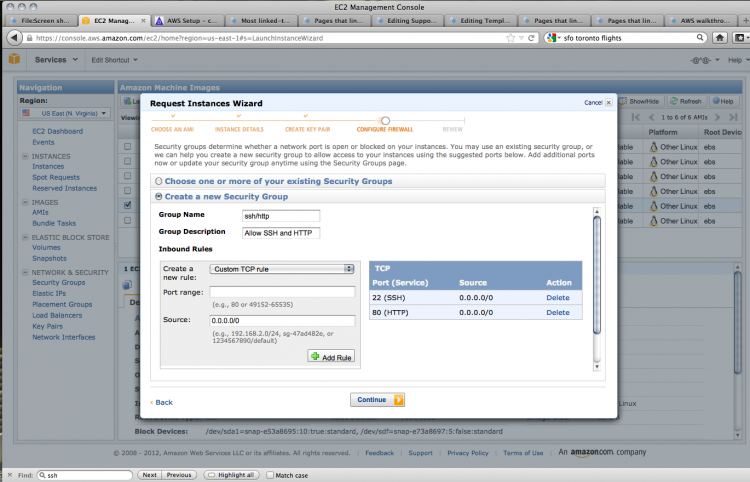
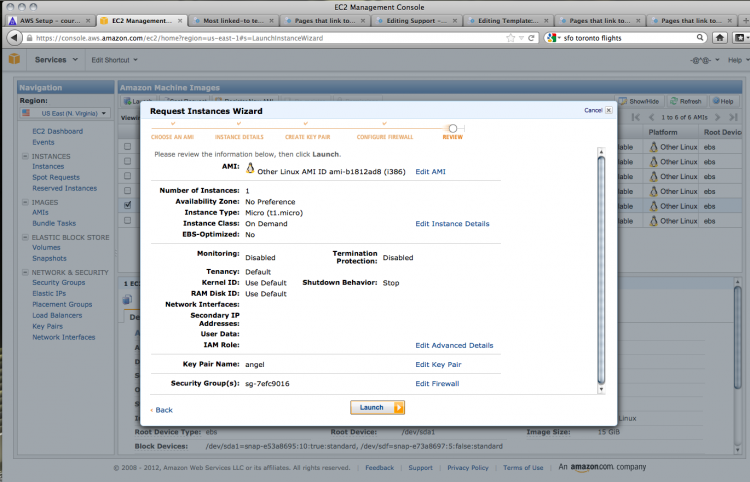
With the security settings done, we can check over our options; if all looks well, click launch!
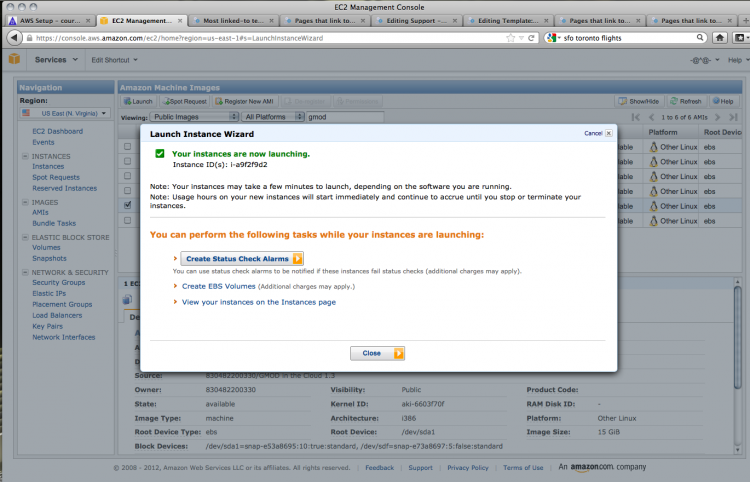
Houston, we have blast off!
Directory Structure
When you log into your GMOD Cloud instance, you will be in the ubuntu user’s home directory, /home/ubuntu, which is part of the root partition of the machine, and so, if you save anything in this directory, it will be deleted when you move to a new version of the GMOD Cloud. To save items from one machine to the next, it must be saved on your EBS partition, and to make that easier from the home directory, we’ve put in a link to the /data partition in the home directory named “dataHome”, so you can “cd /home/ubuntu/dataHome” or “cd ~/dataHome” to save files in a convenient spot relative to your home directory. Already in this dataHome directory is a file called “bashrc” which is automatically included in your .bashrc when you log in, so if you have changes you’d like to make to your shell environment, you can add those changes here.
There are several other directories that are on the /data partition so they will be saved when you go to a new instance as well. These are:
| /data/etc/gbrowse | The config directory for GBrowse. |
| /data/etc/postgresql | The config directory for PostgreSQL |
| /data/opt | A good place to install any other software you want to use |
| /data/var/lib/gbrowse | Other GBrowse files that might be modifed on your instance, including user session data and flat file databases. |
| /data/var/lib/postgresql | Files for the PostgreSQL database |
| /data/var/www/.htaccess | The htaccess file for the main Drupal site |
| /data/var/www/jbrowse/data | All of the data files needed for running JBrowse |
| /data/var/www/sites/default | Site-specific files and directories for Drupal; modules and themes go here (though Tripal is in /var/www/sites/all) |
In all instances, the original files and directories where moved to the /data partition and replaced with symlinks to their new locations. Note that changes made to files in any other locations will be lost. If you find that you must have other files or directories saved, please send an email to gmod-devel@lists.sourceforge.net to request that symlinks be added to future releases.
Interacting with the Server
Logging in
Amazon provides a web-based command line client for interacting with your instance, but you may prefer to use a client on your own computer.
The Amazon documentation includes instructions on connecting to an EC2 machine; note that rather than “root” or “ec2-user”, you need to use “ubuntu” as the user name, so an ssh command would typically looks something like this:
ssh -i my_key.pem ubuntu@ec2-184-72-204-112.compute-1.amazonaws.com
The following screenshots walk you through logging into an AMI using a command line tool. Skip to the next section
Instance Access
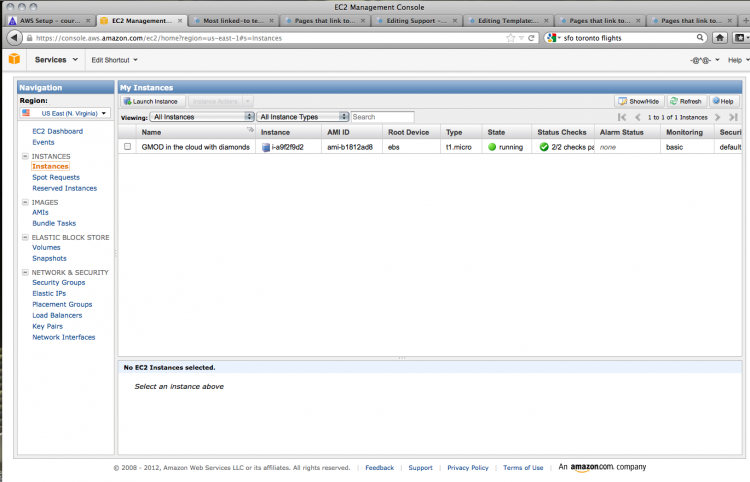
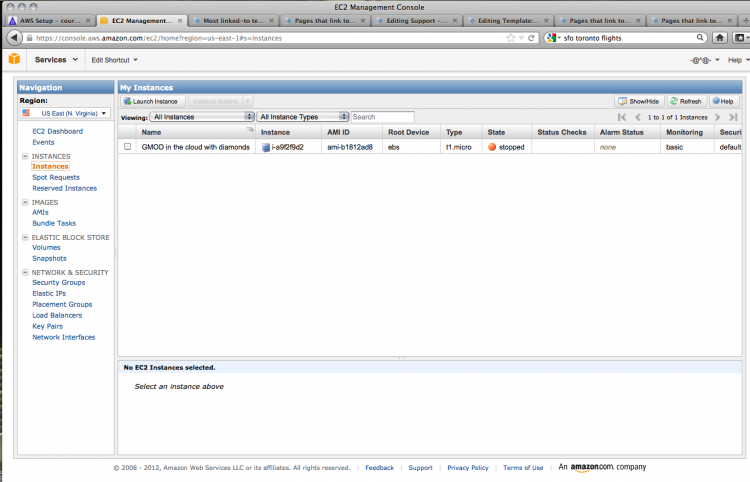
We can now test out our instance. Clicking on Instances shows us the list of all the instances we have running.
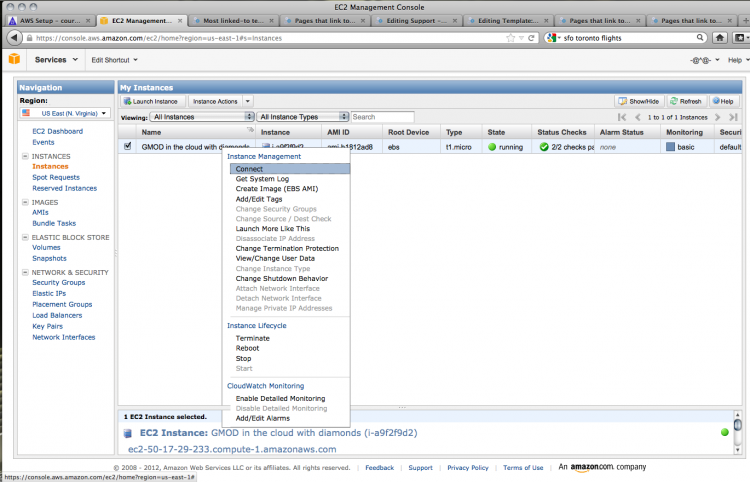
Go to the instance and right-click to bring up a contextual menu. Choose Connect.
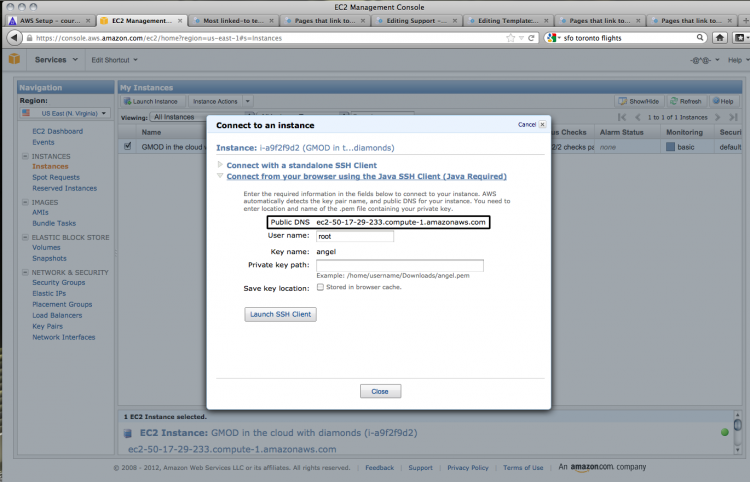
We can test the HTTP connection using the information from the dialogue box that comes up. Copy the public DNS address, found under the open heading Connect from your browser using the Java SSH Client (Java Required).
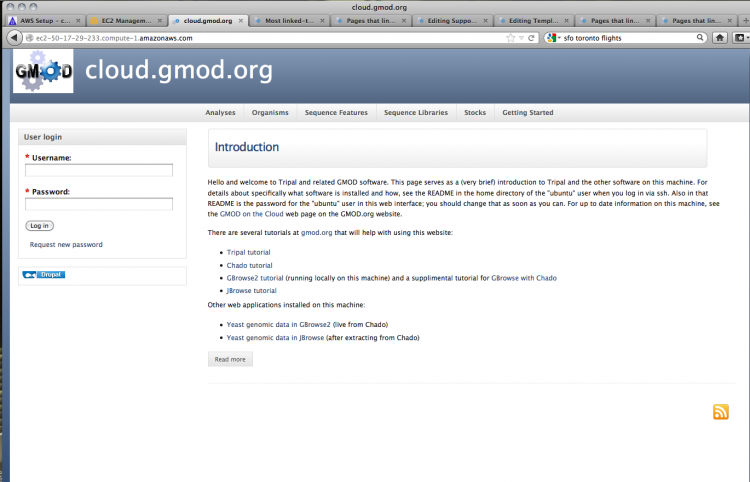
Open that address in a new browser window. If everything has gone correctly, you should see the following screen:
Now let’s check the SSH connection. You can do this through your browser using the built-in Java client. You will need to change the user name to ubuntu and set the private key path to the location where you saved the private key that was generated earlier. Click Launch SSH Client to get connected.
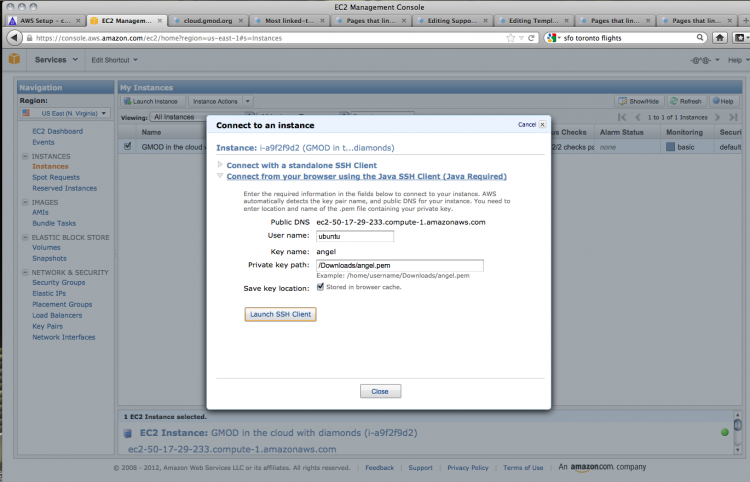
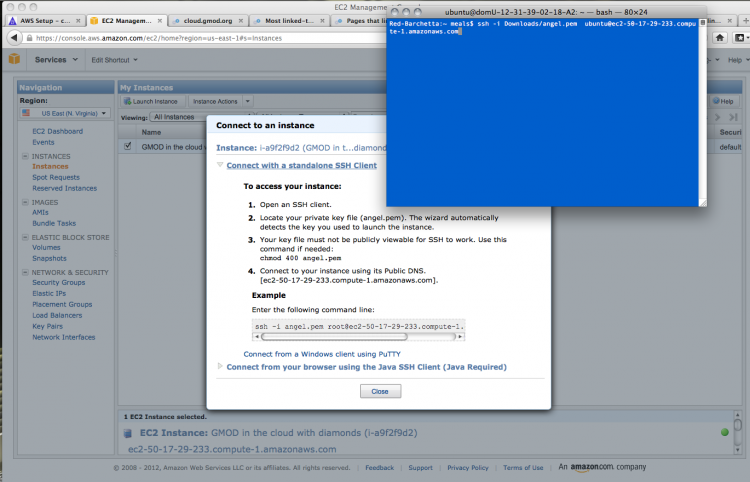
Most bioinformaticists worth their salt prefer a nice command line option, so click on Connect with a standalone SSH client to view the connection information. The first task is to change the file access permissions on the downloaded private key file.

As with the Java browser-based SSH client, you’ll need to change the user name from root to ubuntu. Copy the command given, substituting in the correct path to your private key file and the user name ubuntu.
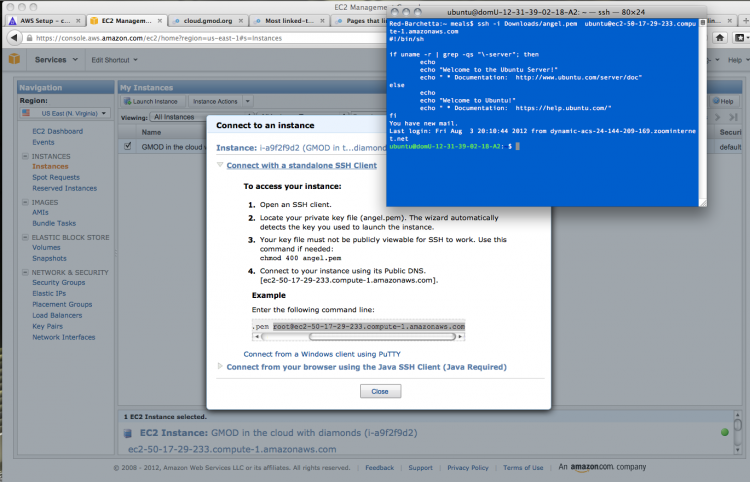
If all goes well, you should log in to the server and get a welcome message:
Resizing your data partition
For the moment, this tutorial is a good guide to resizing EBS partitions on EC2 machines.
Working with the GMOD Software on the Server
Loading Data into Chado
Configuring GBrowse
Getting Data into JBrowse
Configuring Tripal
Leaving the Cloud
Once you have finished working on your GMOD in the Cloud instance, you should remove your data and shut it down (instances can be left running, but be aware that this may be costing you money). This can be achieved in a number of different ways, depending on what we want to happen to the server once we’ve stopped it.
Stop an instance: instance shuts down; changes are saved; instance stays in list of instances.
Terminate an instance: instance shuts down; changes discarded; instance removed from list of instances.
Using sudo /sbin/shudown: depends on the configuration; for GMOD in
the Cloud, the default is the stop behaviour above.
Unless you have a reserved IP address for your instance, you will lose the IP address associated with your GMOD in the Cloud installation when you stop the machine.
Shutting Down
To stop an instance from the command line, type the following:
sudo /sbin/shutdown now
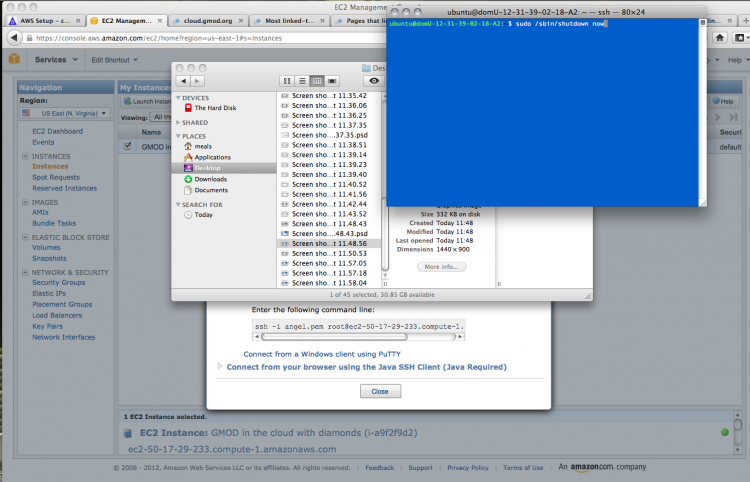
Your instance will start shutting down and your connection with be terminated.

If you return to the Instances window in your browser, your instance will change to the status stopped.
Getting your data off the Cloud
To archive, compress, and securely transfer directory DIR to remote host HOST without writing the archive to your localhost:
$ tar -cjvf - DIR | ssh HOST 'cat > DIR.tar.bz2'
or, using pax:
$ pax -w DIR | bzip2 | ssh HOST 'cat > DIR.tar.bz2'
You can also decompress/untar the archive on-the-fly on the remote host as well (note that the “v” option was omitted from the first tar command to avoid echoing each file twice):
$ tar -cjf - DIR | ssh HOST 'tar -xjvf -'
The default SSH2 cipher, 3des, is somewhat slow; if the data transfer is occurring over a high-speed network, a faster SSH cipher (e.g., blowfish-cbc or arcfour256) may speed up the transfer:
$ tar -cjvf - DIR | ssh -o 'Ciphers blowfish-cbc' HOST 'cat > DIR.tar.bz2'
Thanks to Nathan Weeks for these tips
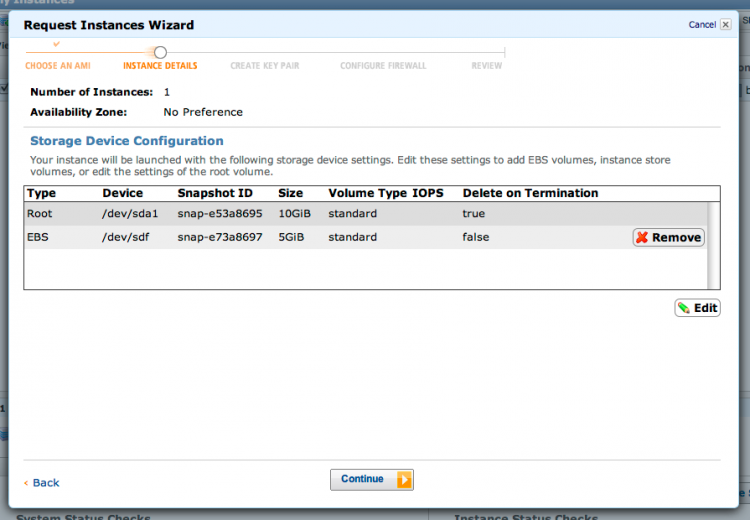
Volume Deletion
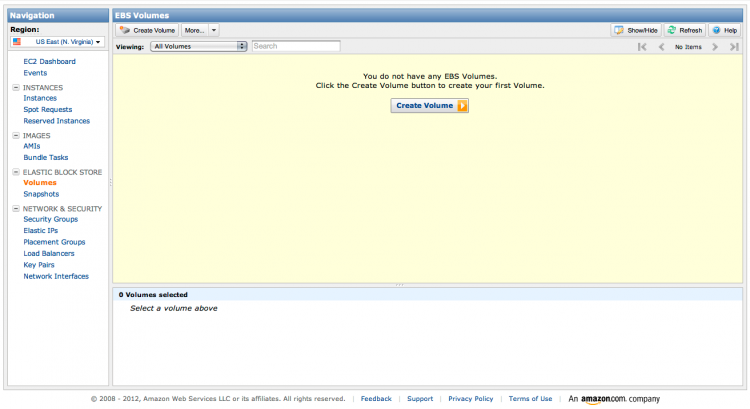
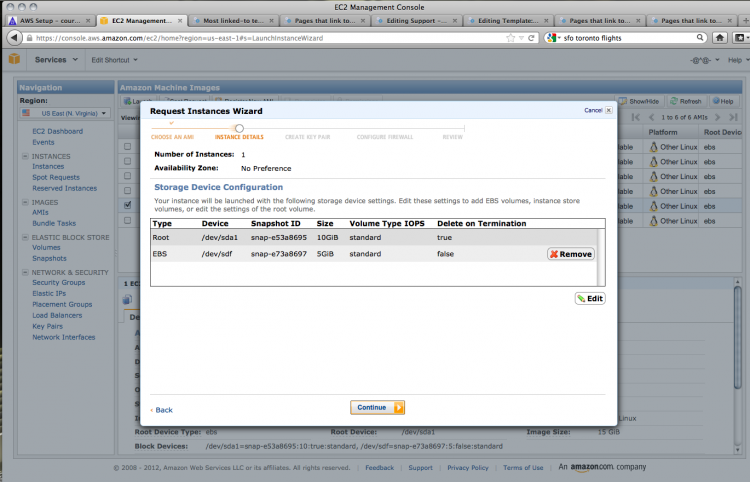
Every GMOD in the Cloud instance uses two volumes (disks), one for applications and the other for data.
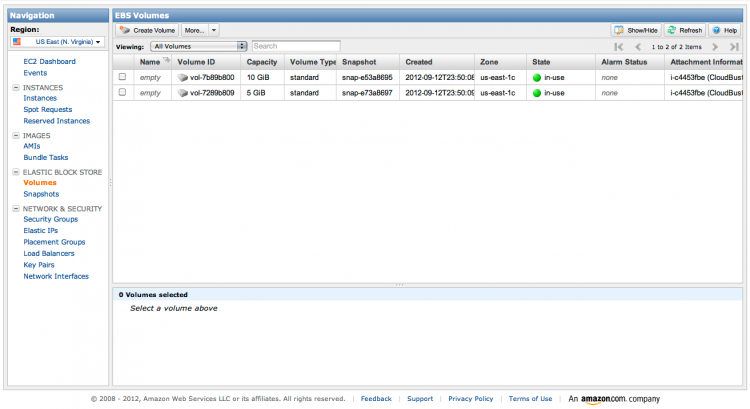
As these screenshot suggest, only the Root volume is deleted when you shut down your AMI.
Amazon charges for data storage, so unless you need to keep the data on the Amazon servers, it is best to transfer the data elsewhere and delete the volume.
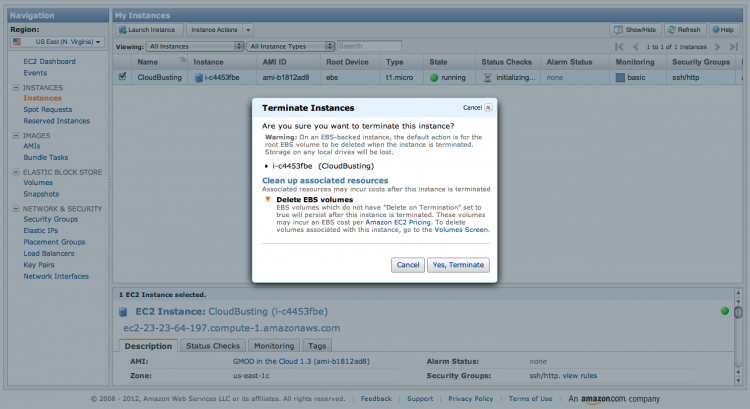
Terminate your instance by choosing Terminate from Instance Actions or by right-/command-clicking on the instance name and selecting Terminate from the menu.
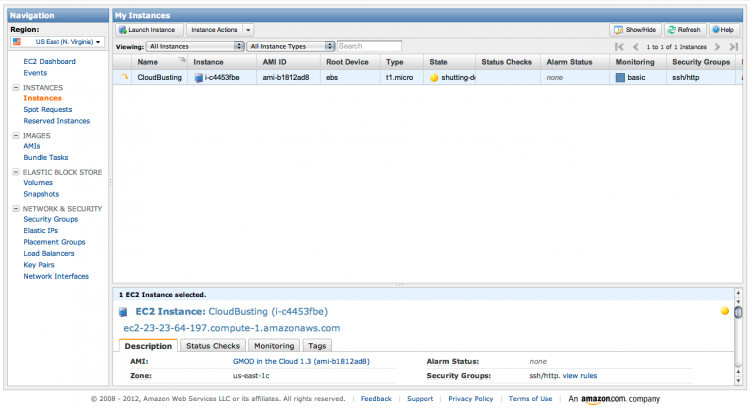
When the instance has terminated, click on Volumes. The Root volume has been deleted but EBS volume remains. Its status is available as it is no longer in use by the instance.

To delete the volume, select it and either choose Delete volume or right-/command-click on the volume name and select Delete.
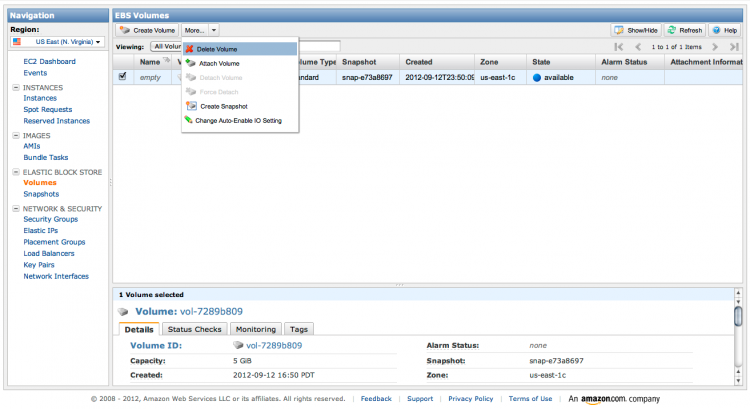
All done!