Difference between revisions of "BioMart Tutorial 2011"
Anthony Cros (Talk | contribs) |
Anthony Cros (Talk | contribs) |
||
| Line 133: | Line 133: | ||
$ MY_DESTINATION_DATABASE=mini_hsap_vega_mart | $ MY_DESTINATION_DATABASE=mini_hsap_vega_mart | ||
$ mysql -hlocalhost -P3306 -ubiomart -pbiomart -e "create database $MY_DESTINATION_DATABASE" | $ mysql -hlocalhost -P3306 -ubiomart -pbiomart -e "create database $MY_DESTINATION_DATABASE" | ||
| + | |||
| + | in theory | ||
Also we have to have martrunner running. Lets run it over a local port (any free one will do). | Also we have to have martrunner running. Lets run it over a local port (any free one will do). | ||
| Line 145: | Line 147: | ||
Note that MartRunner may be run from another machine, as we specify its connection parameters to MartBuilder (see below). | Note that MartRunner may be run from another machine, as we specify its connection parameters to MartBuilder (see below). | ||
| − | We go back to MartBuilder, and click on the '' | + | We go back to MartBuilder, and click on the ''Build Mart'' button to pop up the following dialog: |
| + | |||
<div class="emphasisbox"> | <div class="emphasisbox"> | ||
| − | |||
| − | |||
| − | + | # Datasets: gene | |
| + | # Schema partitions: ''ignore'' | ||
| + | # Target database: mini_hsap_vega_mart (the one we just manually created) | ||
| + | # Target schema: mini_hsap_vega_mart | ||
| + | # Send SQL to: MartRunner (other options are available) | ||
| + | # MartRunner host name: localhost | ||
| + | # MartRunner port number: 9876 (the one we just '''arbitrarily''' chose because it was free) | ||
| + | # Database server name: localhost | ||
| + | # Database server port number: 3306 | ||
| − | |||
| − | + | [[File:Mb__build_mart_dialog.png]] | |
| + | </div> | ||
| − | |||
| − | |||
| − | |||
<div class="emphasisbox"> | <div class="emphasisbox"> | ||
| + | Click on the ''Generate SQL'' button | ||
| + | |||
[[File:Mb__sql_generation.png]] | [[File:Mb__sql_generation.png]] | ||
</div> | </div> | ||
| Line 176: | Line 184: | ||
| − | = Configuring mart (MartConfigurator) = | + | = Configuring mart (MartConfigurator) - basic = |
This section will show you how to configure the created VEGA mart using MartConfigurator | This section will show you how to configure the created VEGA mart using MartConfigurator | ||
| − | == | + | == Start MartConfigurator == |
| − | + | Start MartConfigurator with the following command in the directory of your installation: | |
$ dist/scripts/martconfigurator.sh | $ dist/scripts/martconfigurator.sh | ||
| Line 237: | Line 245: | ||
| − | === | + | === Creating Access Point === |
<div class="emphasisbox"> | <div class="emphasisbox"> | ||
| Line 250: | Line 258: | ||
| − | === | + | === Customizing configuration === |
<div class="emphasisbox"> | <div class="emphasisbox"> | ||
| − | Double-click on the access point ''mini_hsap_vega_mart_ap'' to bring out the configuration editor | + | Double-click on the access point ''mini_hsap_vega_mart_ap'' to bring out the configuration editor (will be detailed in the following section) |
[[File:Mc__config.png]] | [[File:Mc__config.png]] | ||
</div> | </div> | ||
| + | |||
| + | = Configuring mart (MartConfigurator) - more advanced = | ||
VIEW ??? Schema, management window?? | VIEW ??? Schema, management window?? | ||
Revision as of 16:16, 13 October 2011
| {{#icon: Biomart250.png|BioMart|200|BioMart}} {{#icon: 170px-October2011Logo.png|October 2011 - Toronto |
2009 GMOD Summer School - Toronto, Canada}} | BioMart Session 2011 GMOD Community Meeting & |
__NOTITLE__
This tutorial walks you through how to install and configure a local installation of BioMart.
Contents
System overview and installation
Prerequisites for BioMart:
- Software: Java 1.6, Ant and SVN client
- OS: Linux, Mac & Windows
- Server: min. 1 GB memory, 3 GB for better performance
Downloading & Installing BioMart
2 components are necessary for this tutorial, one from the older version of BioMart, one from the newer (until all features are fully ported to the new version)
Following installation of BioMart is actually already been done on the VM image under ~/biomart_0_7.template and ~/biomart_0_8.template but we are going to do it again once.
Refer to BioMart Documentation for more information.
Biomart 0.7 (MartJ -> MartBuilder + MartRunner)
MartJ contains applications necessary to create a Mart: MarBuilder and MartRunner.
Check Section 2 in Installing BioMart for more information.
Download & extract tarball content with:
 $ mkdir ~/biomart_0_7 # arbitrary name of course
 $ cd ~/biomart_0_7
 $ wget ftp://anonymous@ftp.ebi.ac.uk/pub/software/biomart/martj_current/martj-bin.tgz # or get it from MartJ
 $ tar zxvf martj-bin.tgz # creates "martj" directory
 $ cd martj
 $ ls bin/martbuilder.sh bin/martrunner.sh # what we care about
Biomart 0.8 (MartConfigurator)
Checkout latest release using SVN:
 $ mkdir ~/biomart_0_8 # arbitrary name of course
 $ cd ~/biomart_0_8
 $ svn co https://code.oicr.on.ca/svn/biomart/biomart-java/branches/oct_3_2011 # creates "oct_3_2011" directory
 $ mv oct_3_2011 martconfigurator # friendlier name
 $ cd martconfigurator
 $ ant # build project with ant; in the future, you may use: ant clean dist
 $ ls dist/scripts/martconfigurator.sh dist/scripts/biomart-server.sh # what we care about
Building mart
This section will show you how to create a (simplified) mart containing 1 dataset based on the VEGA database, using MartBuilder.
Describing mart (MartBuilder)
Creating/loading sample mart
Start MartBuilder
From the directory ~/biomart_0>7/martj, issue:
$ bin/martbuilder.sh
MartBuilder should open with an empty mart.
Add a schema
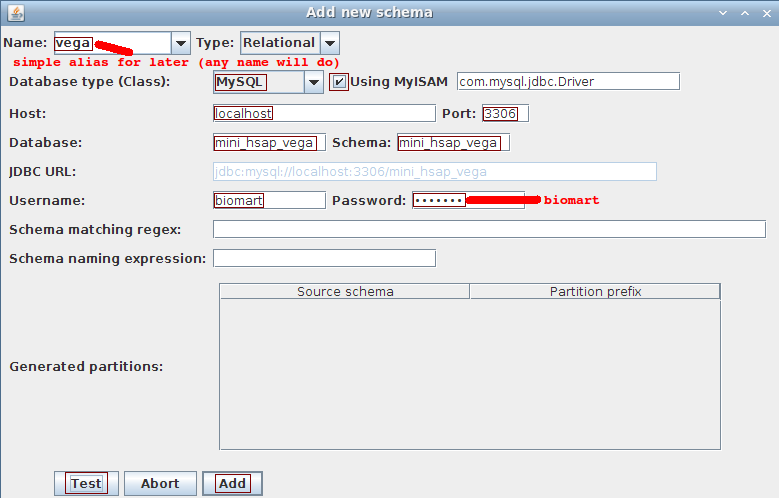
Choose Schema->Add to open the dialog to add a schema.
- Name: vega
- Database type: MySQL
- Using MyISAM: checked
- Host: localhost
- Port: 3306
- Database: mini_hsap_vega
- Schema: mini_hsap_vega
- Username: biomart
- Password: biomart
ignore the last 3 fields (used for partitioning which is not covered in this tutorial)
Click the Test button to ensure we can connect to the database. Click the Add button in order to proceed with the dataset description.
You should now see the source database show in MartBuilder.
Note that if you did not specify a schema when creating your database, your tables will be in the default schema for your platform:
- MySQL: has no notion of schema, database acts as a schema
- PostGreSQL: public
- Microsoft SQL Server: dbo
- Oracle & DB2: the username of the user who created the database
Choose dataset
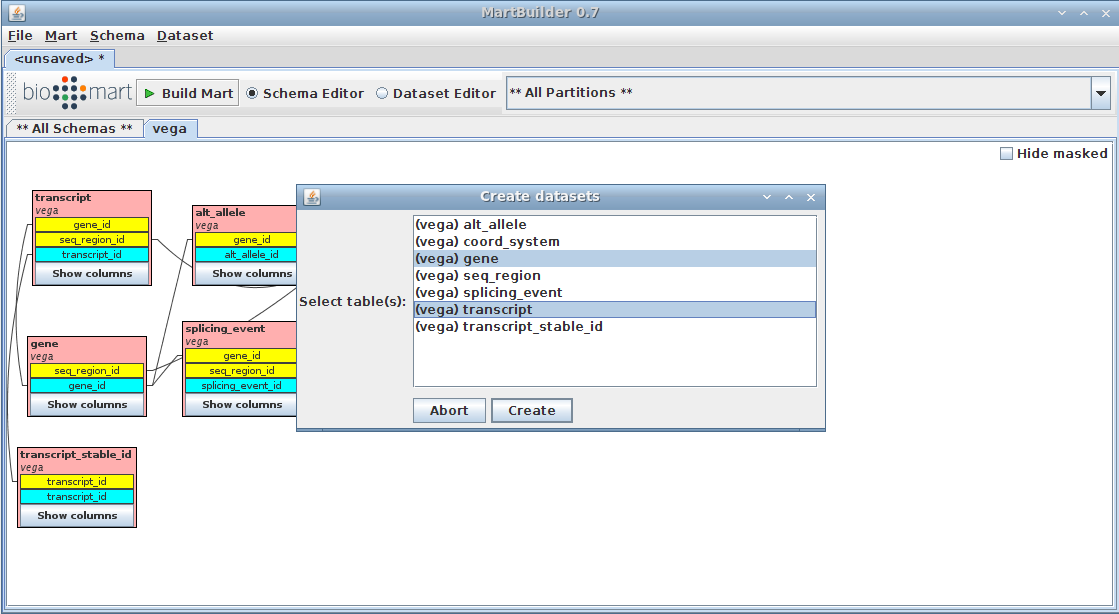
We are going to create a dataset based on the tables "gene" and "transcript" (as main and submain tables respectively, as described in presentation)
- Right-click on the "gene" table
- Click on Create dataset TODO
the gene table should be highlighted already as we arrived on the current menu by clicking on it
- add the transcript table (standard "Ctrl + click)
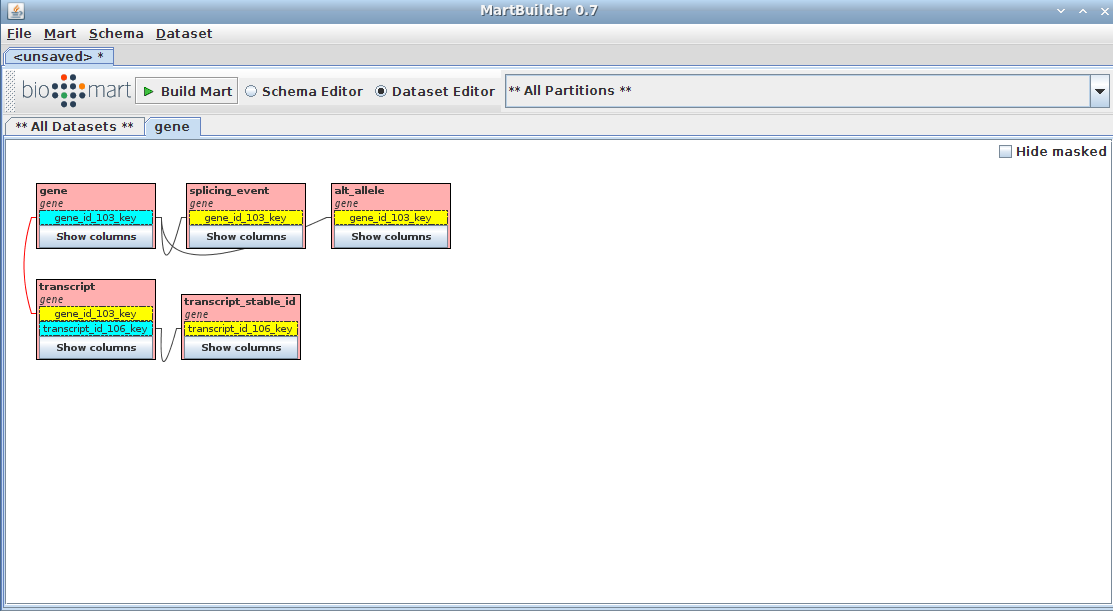
- Press the Create button
Materializing mart (MartBuilder->MartRunner)
Your dataset does not actually exist yet. In order to create it, you need to generate the SQL for it then run that SQL against your database.
BioMart offers a tool (MartRunner) that does that for you, using JDBC. The SQL used is as ANSI-compliant as possible, with some exceptions based on the RDBMS in use.
4. We now going to transform the source data into target dataset, but before that, we have to create a target database:
 $ MY_DESTINATION_DATABASE=mini_hsap_vega_mart
 $ mysql -hlocalhost -P3306 -ubiomart -pbiomart -e "create database $MY_DESTINATION_DATABASE"
in theory
Also we have to have martrunner running. Lets run it over a local port (any free one will do).
5. Start martrunner with:
 $ MY_MART_RUNNER_PORT=9876
 $ bin/martrunner.sh $MY_MART_RUNNER_PORT
MartBuilder will send the materialization SQL to MartRunner through that port (in this example, 9876), and MartRunner will execute the transformation SQL.
Note that MartRunner may be run from another machine, as we specify its connection parameters to MartBuilder (see below).
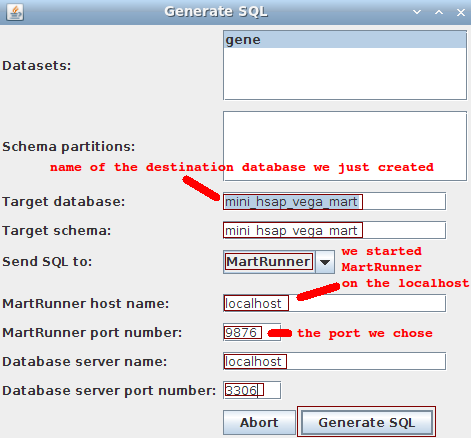
We go back to MartBuilder, and click on the Build Mart button to pop up the following dialog:
- Datasets: gene
- Schema partitions: ignore
- Target database: mini_hsap_vega_mart (the one we just manually created)
- Target schema: mini_hsap_vega_mart
- Send SQL to: MartRunner (other options are available)
- MartRunner host name: localhost
- MartRunner port number: 9876 (the one we just arbitrarily chose because it was free)
- Database server name: localhost
- Database server port number: 3306
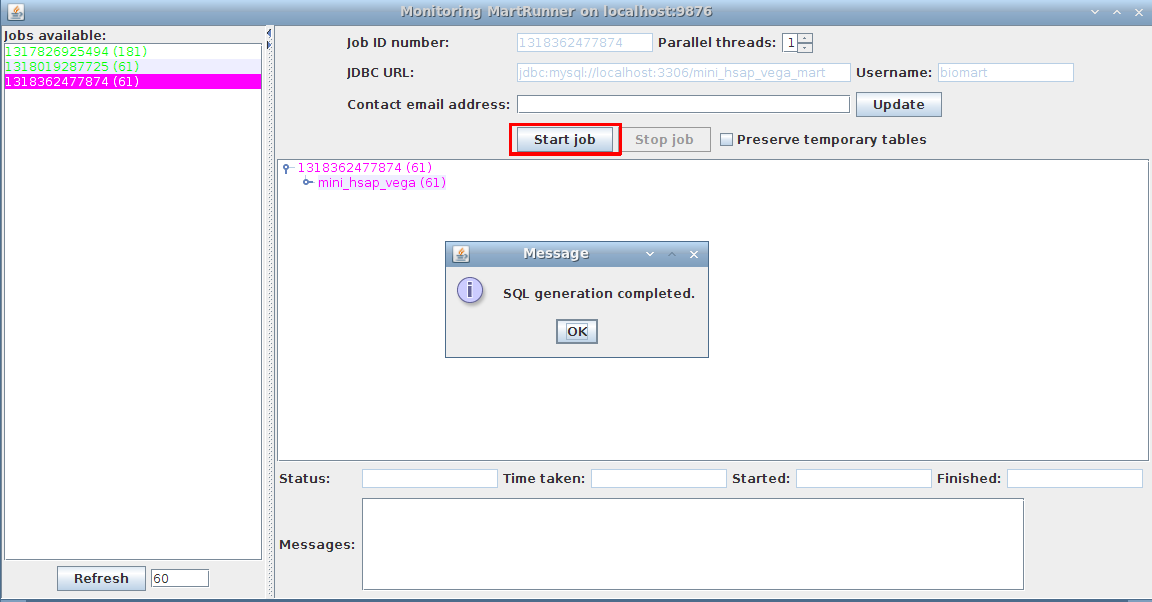
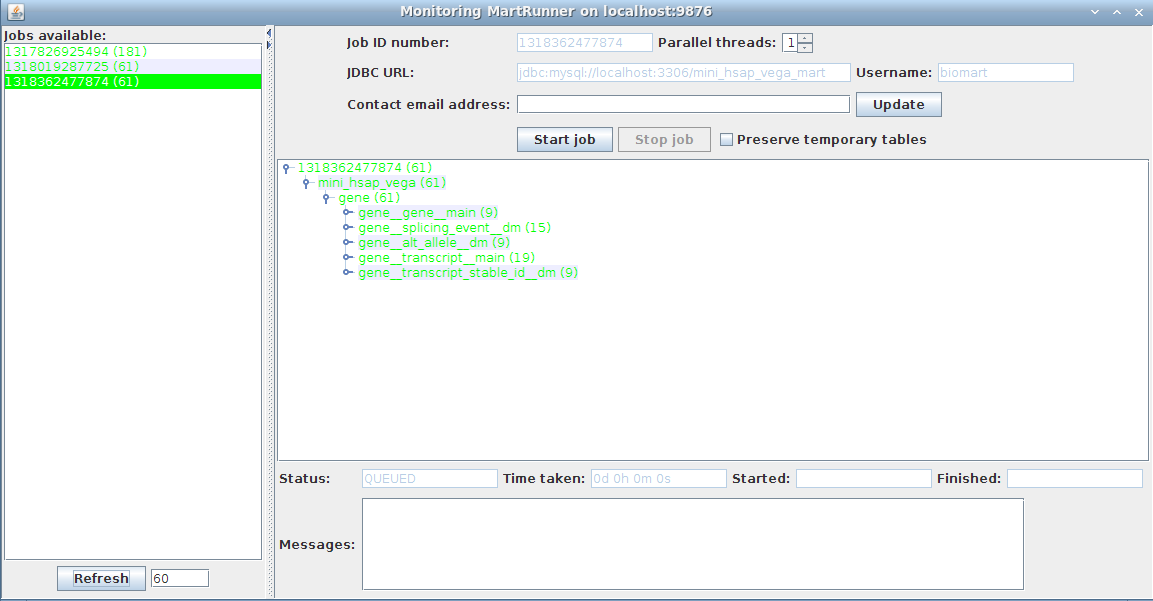
5. Monitor progress using the Monitor MartRunner progress
Your schema now contains a mart with a complete dataset ready for configuring with MartConfigurator.
Configuring mart (MartConfigurator) - basic
This section will show you how to configure the created VEGA mart using MartConfigurator
Start MartConfigurator
Start MartConfigurator with the following command in the directory of your installation:
$ dist/scripts/martconfigurator.sh
Add Mart
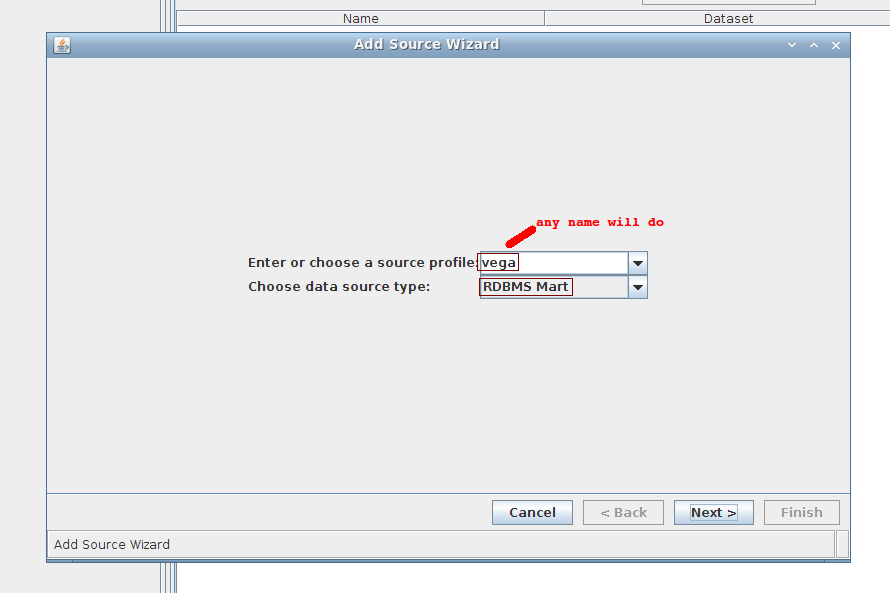
1. Wizard step 1/4:
Fill in the fields using the following values:
- source profile: vega (anything will do)
- source type: MySQL
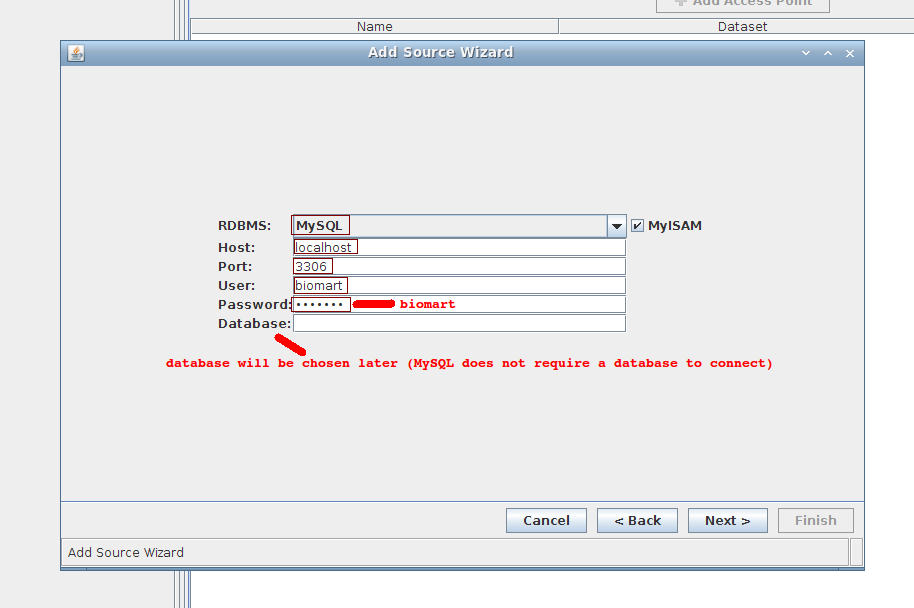
2. Wizard step 2/4:
- RDBMS: MySQL (keep MyISAM)
- Host: localhost
- Port: 3306
- User: biomart
- Password: biomart
- Database: can leave empty for now
3. Wizard step 3/4:
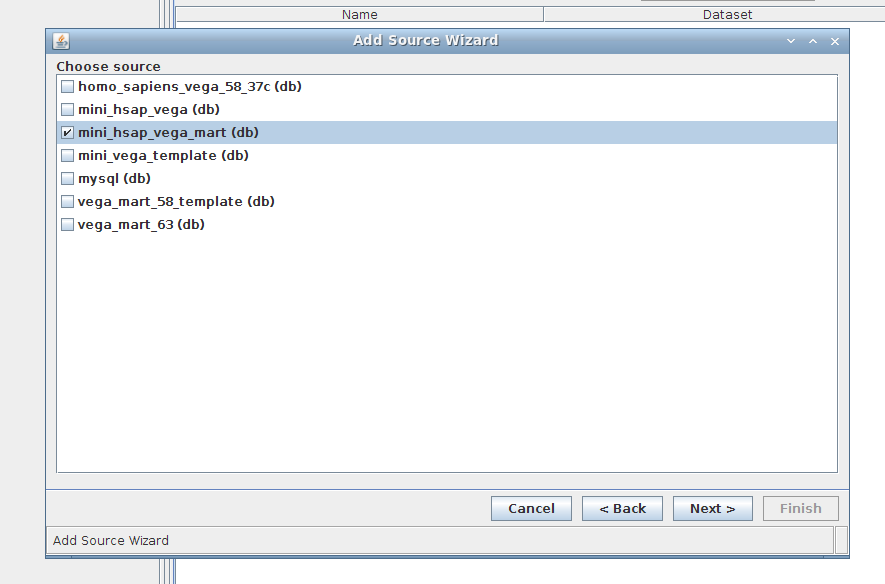
Select mini_hsap_vega_mart, the mart that we just built using MartBuilder/MartRunner and based upon the mini_hsap_vega database
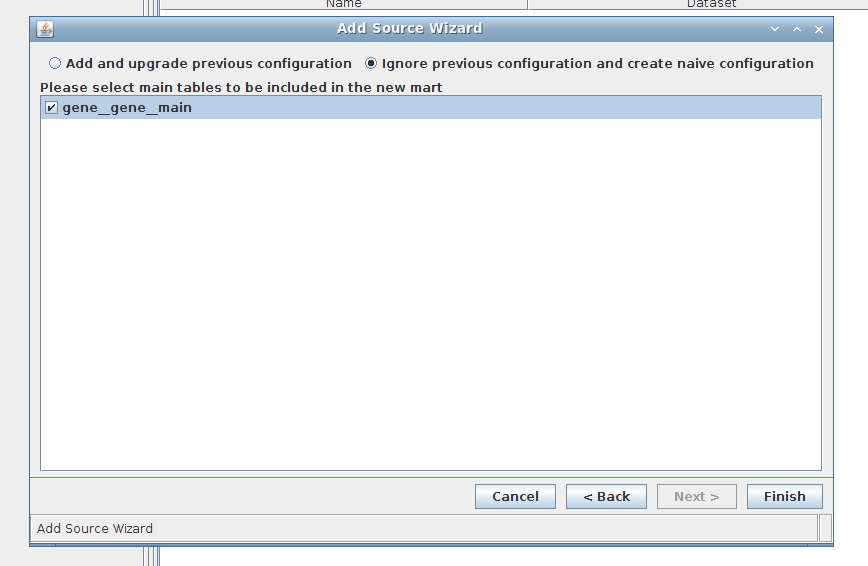
4. Wizard step 4/4:
5. Done!
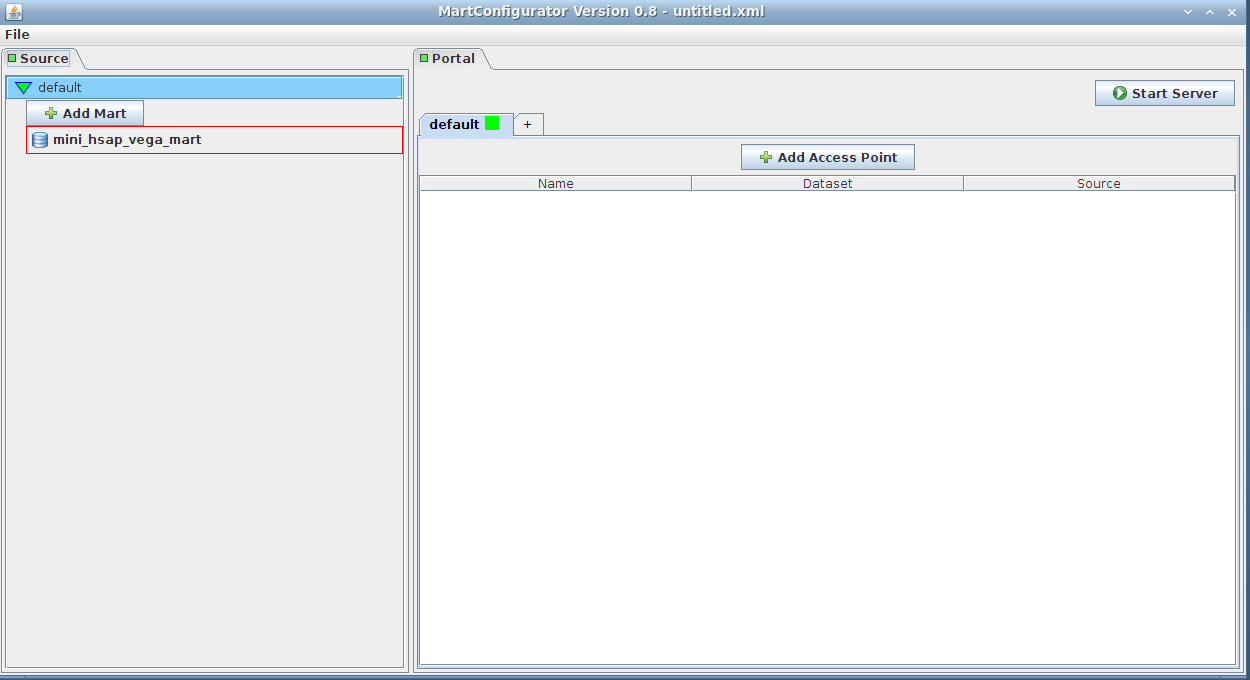
You are now connected!
The panel on the left corresponds to source schemas; in our case we only have one mart that has one dataset: mini_hsap_vega_mini, but there could be more
The panel on the right corresponds to configuration of those source schemas (accessibility, rendering, linking, ...)
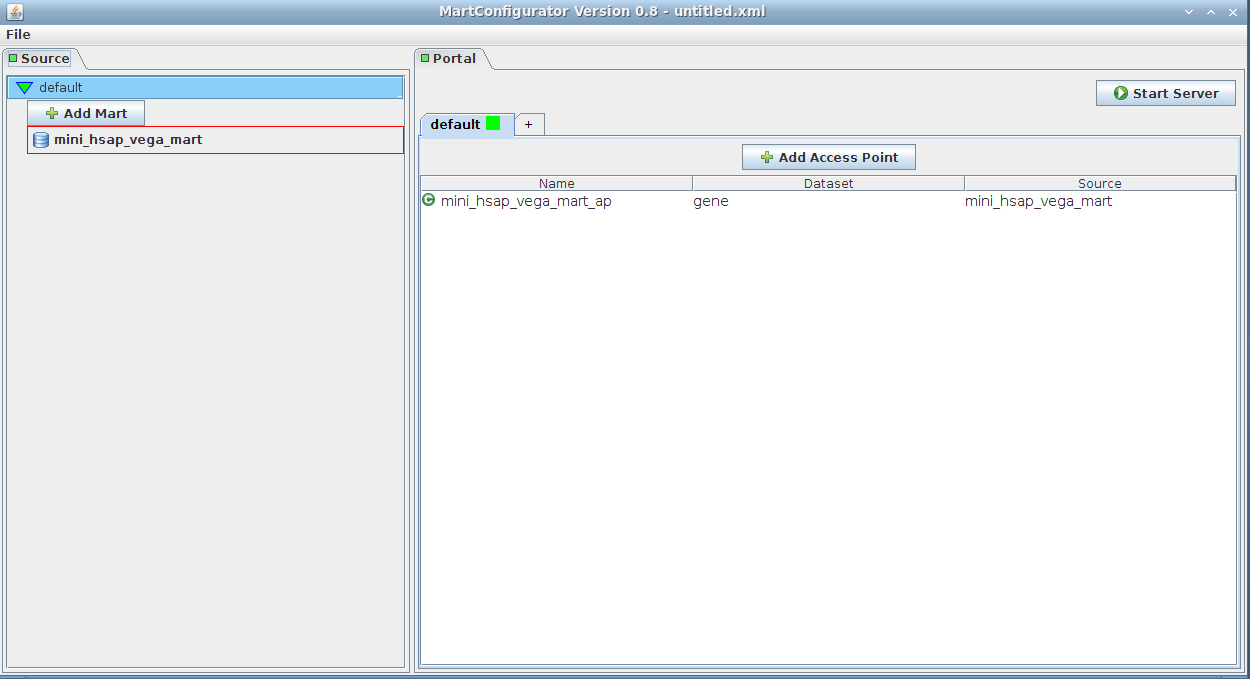
Creating Access Point
Simply drag-and-drop the source from the left side (Source frame) to anywhere on the right side (Portal frame)
It will add an access point to the mart (default name is mini_hsap_vega_mart_ap, ap standing for Access Point obviously)
Note that clicking the Add Access Point button would yield the same result. You would then be given a list of the existing marts to choose from. You may give the access point a custom name.
Customizing configuration
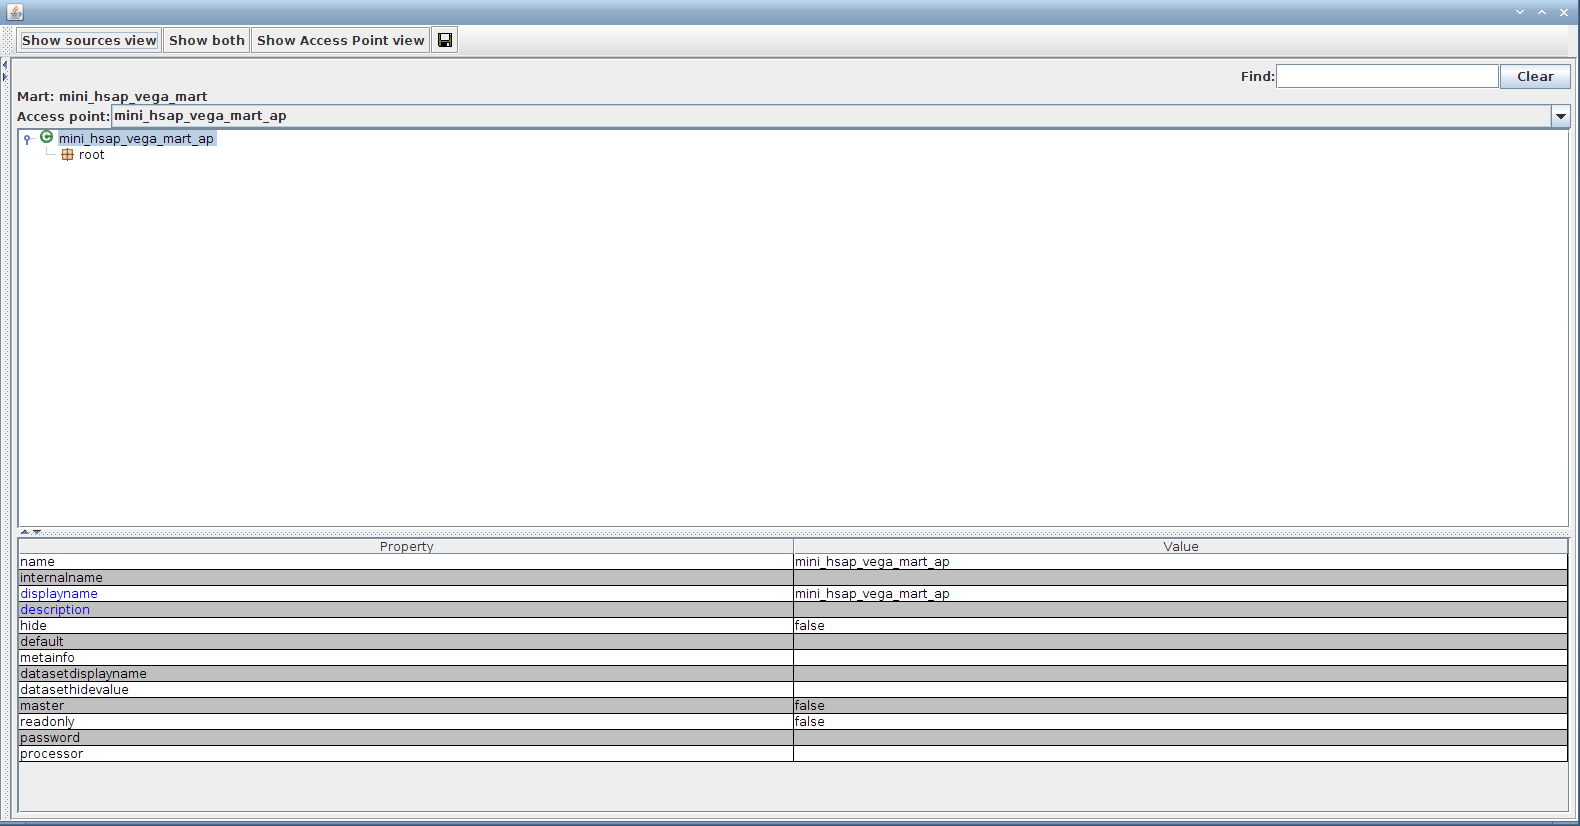
Double-click on the access point mini_hsap_vega_mart_ap to bring out the configuration editor (will be detailed in the following section)
Configuring mart (MartConfigurator) - more advanced
VIEW ??? Schema, management window??
The display name of any object (a container, attribute, or filter) can be changed by selecting that object (by clicking on it) and then double clicking the displayname property in the lower right-hand pane.
Deploy BioMart Server
To test the registry, you can now click on the Start Server button in the upper right. You will be prompted to save the registry file you have created, and after doing so, the server will be deployed on your local machine, port 9000. Your web page should open automatically when the local server is ready. You can also deploy BioMart from the command line on the server. To deploy BioMart, from the directory of your installation, run the following command:
./dist/scripts/biomart-server.sh start
To Stop the server, use the command:
./dist/scripts/biomart-server.sh stop
More exercises with MartConfigurator
Here we should include
- rename 'default' GUI tab to "Form"
- add another GUI tab name it as "Wizard", and set the GUIType to MartWizard
- add vega mart via DB based BC
- create an AccessPoint under Form, and another one under Wizard
- deploy
- exam chromosome filter (singleSelect), gene type filter (multiSelect), how to edit dropdown options for those filters
- exam Multiple Chromosomal Regions (Chr:Start:End:Strand) filter
- create attribute list
- add pathway dataset via URL data source
- drag&drop pathway name attribute to vega AP under Form GUI tab, this will trigger link creation (detailed below)
- link creation between pathway and vega gene. use ensembl gene id as the attribute/filter pair to build the link
- deploy the server and select pathway name together with other attribute from vega gene dataset, exam the result
- drag&drop pathway name filter to vega AP under Wizard GUI tab, then deploy the sever and choose pathway filter then exam result
Set Filter typesSet Attribute URLSelect GUI type
Creating Links between sources
If two data sources contain common information (e.g. a Gene/Protein ID), this can be used to create a link, allowing filters and attributes from one data source to appear in the other. These are called “pointer attributes” and “pointer filters,” and the attribute or filter to which they point is called the “target. ”To add a pointer to an access point, double click on that access point in the portal tab to edit it. In the top left corner of the editing window, click on the Import from sources button.
You will be given a list of the existing data sources to choose which one you would like to make an access point for. After giving the new access point a name of your choice, it will appear in the GUI tab. Double-clicking on the access point icon will open a new window that allows you to modify the access point. References
5. Querying a BioMart server via REST API
5.1 MetaData queries
http://localhost:9000/martservice/marts
http://localhost:9000/martservice/datasets?mart=gene_vega
http://localhost:9000/martservice/accesspoints?datasets=&mart=gene_vega
http://localhost:9000/martservice/attributes?dataset=hsapiens_gene_vega&mart=gene_vega
http://localhost:9000/martservice/filters?dataset=hsapiens_gene_vega&mart=gene_vega
5.2 Data query
<xml> <Query processor="TSV" header="true" limit="-1" client="webbrowser"> <Dataset name="hsapiens_gene_vega" config="gene_vega_ap"> <Filter name="chromosomal_region" value="2:1000000:2000000:1,4:9000000:11000000:-1"/> <Filter name="biotype" value="protein_coding"/> <Attribute name="vega_gene_id"/> <Attribute name="vega_transcript_id"/> <Attribute name="vega_translation_id"/> <Attribute name="chromosome_name"/> <Attribute name="start_position"/> <Attribute name="end_position"/> <Attribute name="strand"/> <Attribute name="band"/> </Dataset> </Query> </xml>
Paste this piece of XML in a web browse address as:
http://localhost:9000/martservice/results?query=paste_query_xml_string_here
To read more about BioMart, refer to the recent articles describing the BioMart software and its applications.
1. Zhang J, Haider S, Baran J, Cros A, Guberman JM, Hsu J, Liang Y, Yao L, Kasprzyk A. BioMart: a data federation framework for large collaborative projects. Database (Oxford). 2011 Sep 19:2011:bar038.
2.Guberman JM, Ai J, Baran J., et al. BioMart Central Portal: An Open Database Network for the Biological Community. Database (Oxford). 2011 Sep18;2011:bar041.
3. Zhang J, Baran J, Guberman JM, Haider, S, Hsu J, Liang Y, Rivkin E, Wang J, Whitty B, Wong-Erasmus M, Yao L, Kasprzyk A. International Cancer Genome Consortium Data Portal - a One-stop Shop for Cancer Genomics Data. Database (Oxford). 2011 Sep19;2011:bar026.
