Template:AWS Instance Launch
Launch an Instance
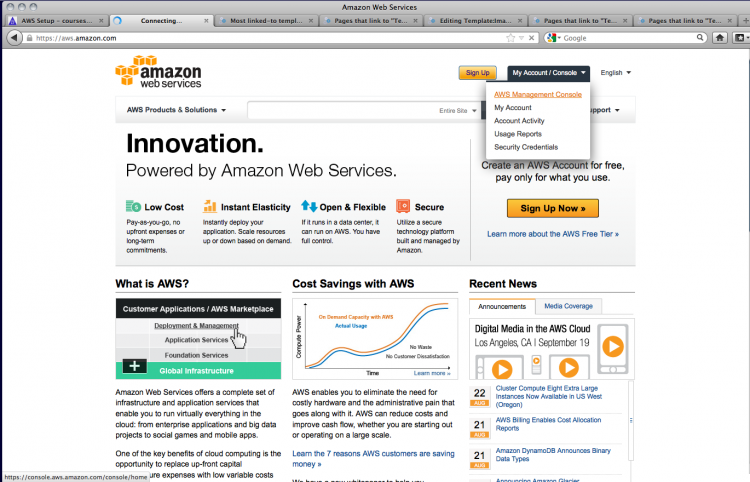
Return to the AWS home page (confusingly, the "sign up" link is still present and there's no indication that you're logged in). Select the AWS Management Console link under My Account/Console.
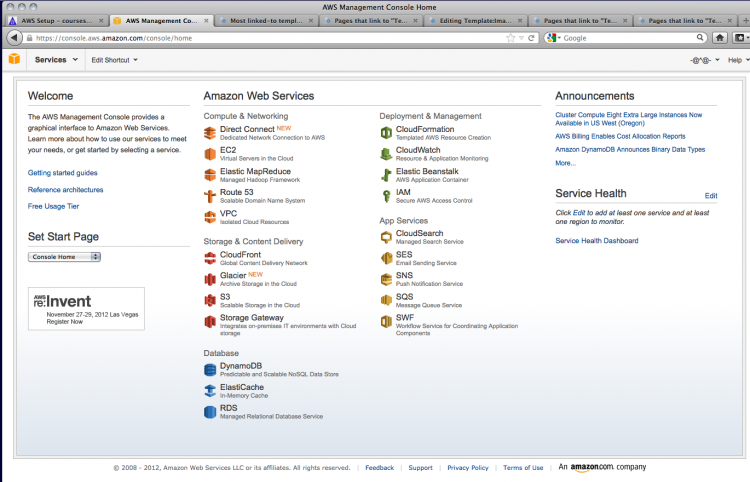
This takes you to the console. Click on EC2 to access cloud computing services.
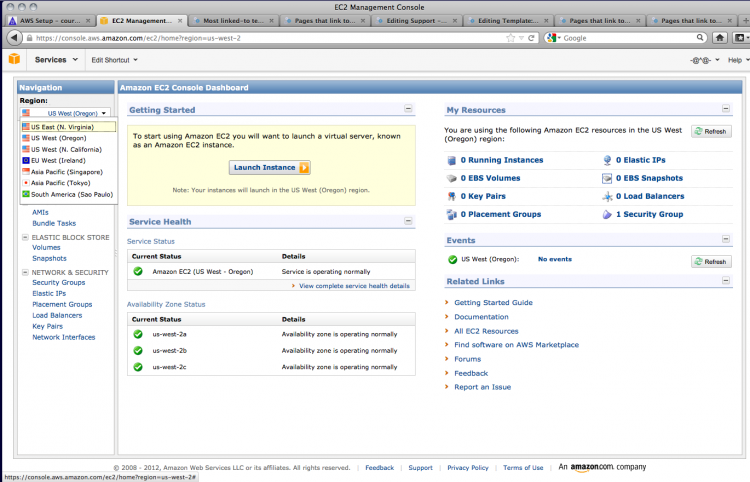
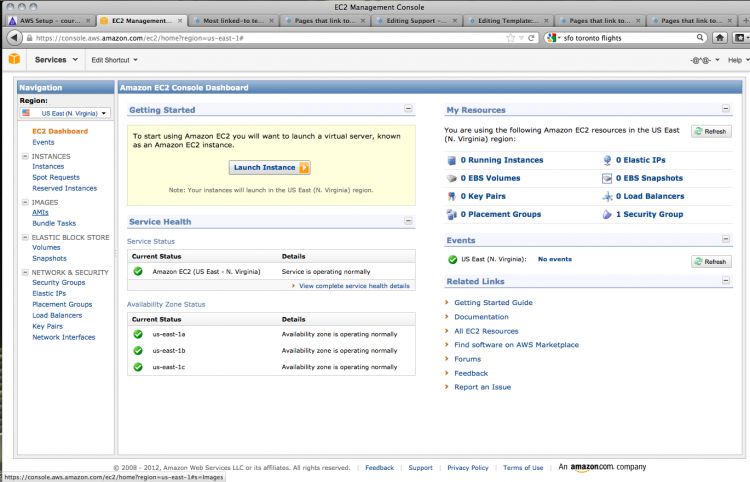
At present, GMOD in the Cloud 1.3 is only available in the US East area. You may need to change the setting in the Navigation section on the left.
Once you have set the region, you can search for the AMI you want.
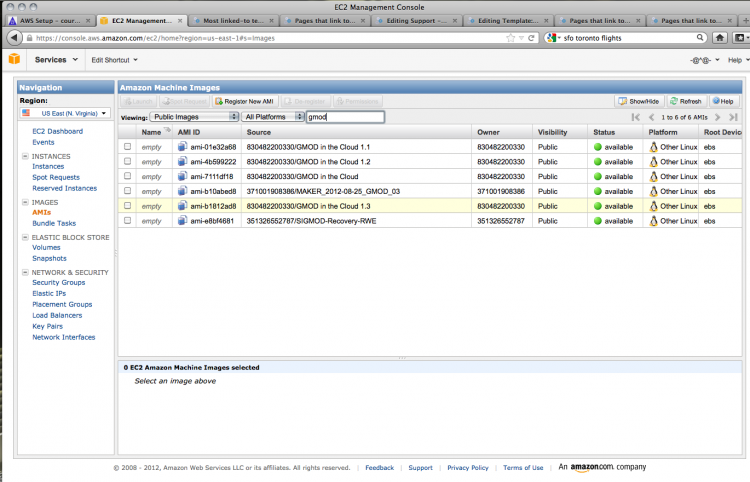
Click on AMIs in the left-hand menu to view or search for Amazon Machine Images, AMIs. You can find the GMOD image by searching public images.
A search for gmod brings up a number of AMIs; choose the most recent GMOD in the Cloud image (1.3 as of August 2012).
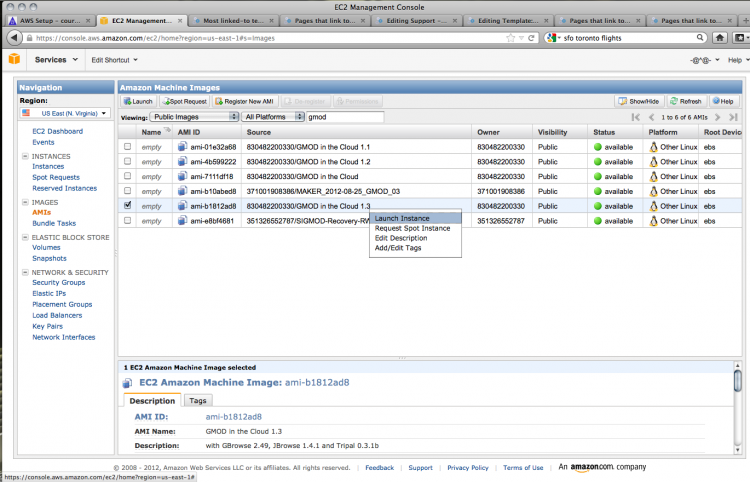
Right-clicking on the AMI of your choice brings up a contextual menu; choose Launch Instance to create your instance.
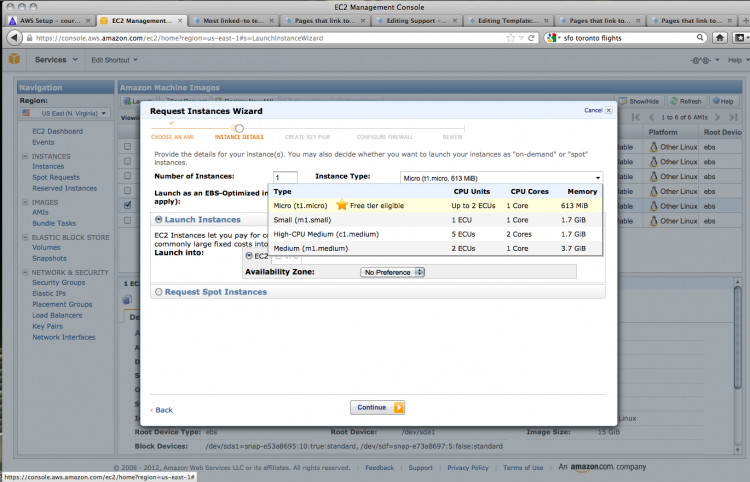
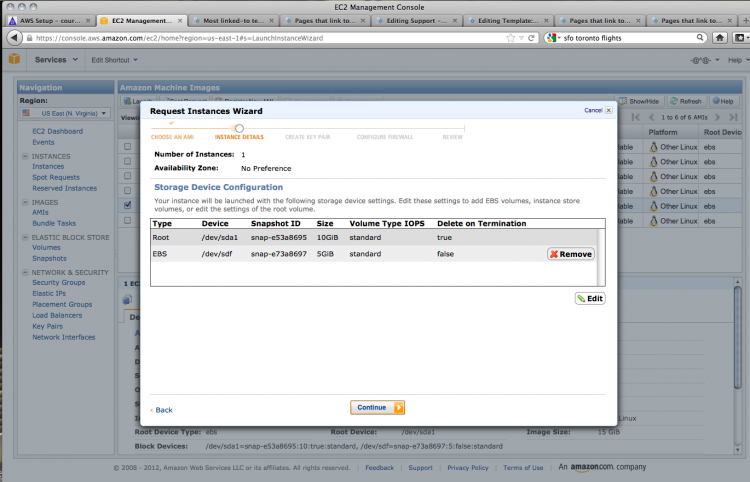
There are a number of options for your instance. You can choose the capabilities of your cloud computer; in this case, only the lowest spec computer is available for users of the free services. The defaults are fine for our purposes.
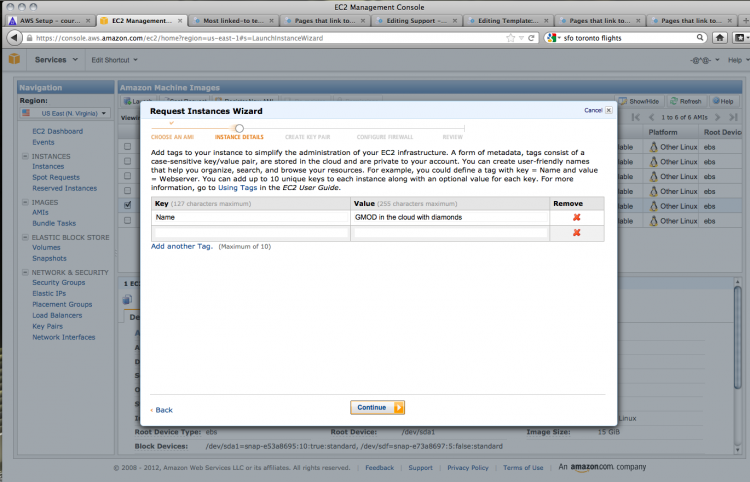
You can add information for your instance in the form of key-value pairs. Give your instance a name by adding 'Name' to the key field and an appropriate name in the value field.
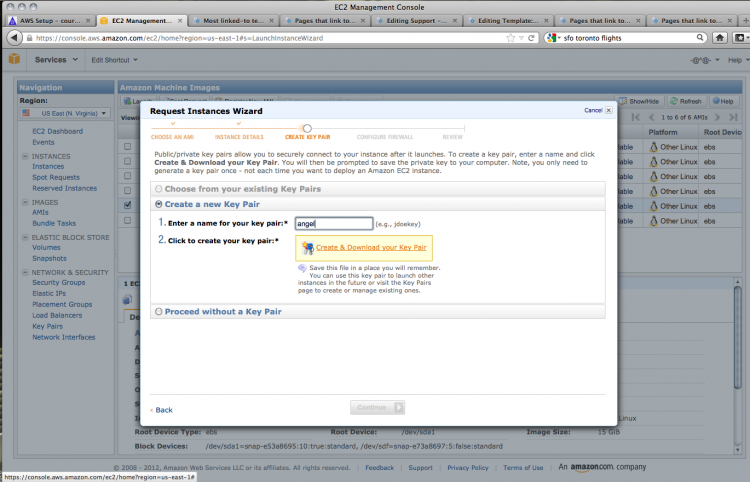
To be able to access your AMI, you'll need to create a key pair. Choose a key word and Amazon will generate a private key for you.
Save this to disk for later use.
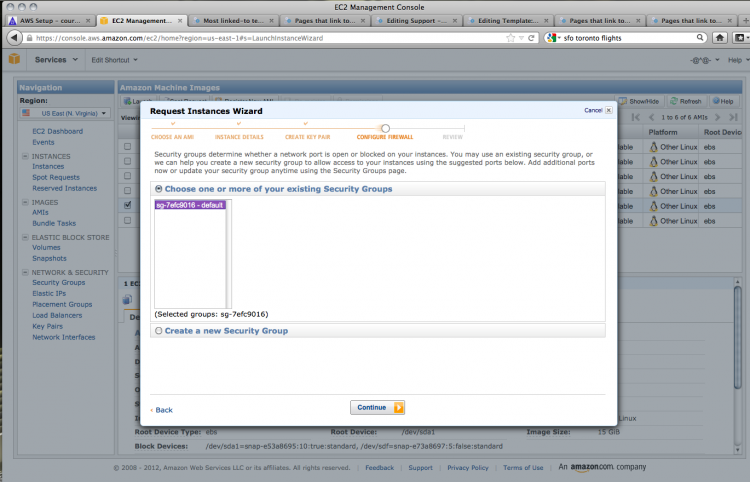
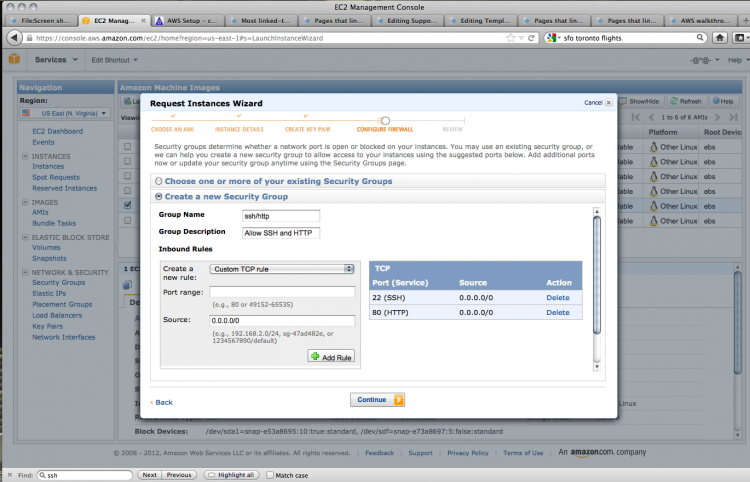
You can now configure the security options for your instance. These settings will allow you to access the AMI using various protocols.
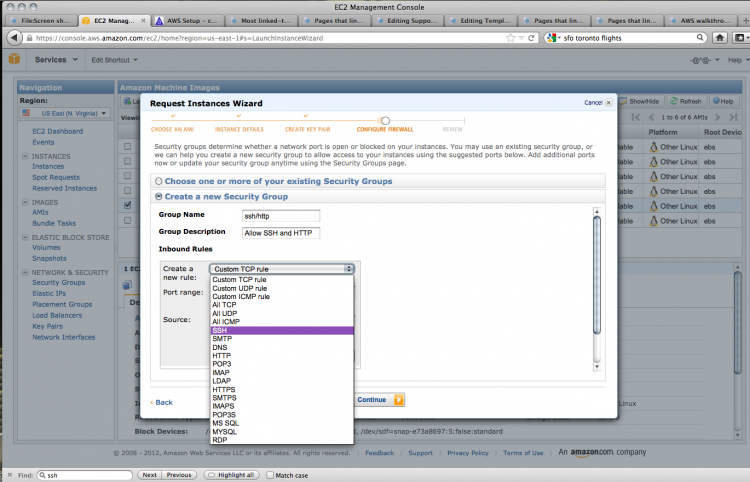
The default settings do not allow any access, but we want to use SSH (secure shell) and HTTP (standard browser-based web protocol) to get into our instance. To do this, create a new security group; give it a name and a description.
You can then add the two kinds of connections that we want to allow. Choose SSH from the drop-down menu. The source field dictates the IP addresses that can contact the instance using SSH. Unless you need to restrict access to certain IP addresses, this can be left as is.
Use Add rule to create another rule for HTTP access. Once again, choose HTTP from the drop-down menu and leave the source field as it is.
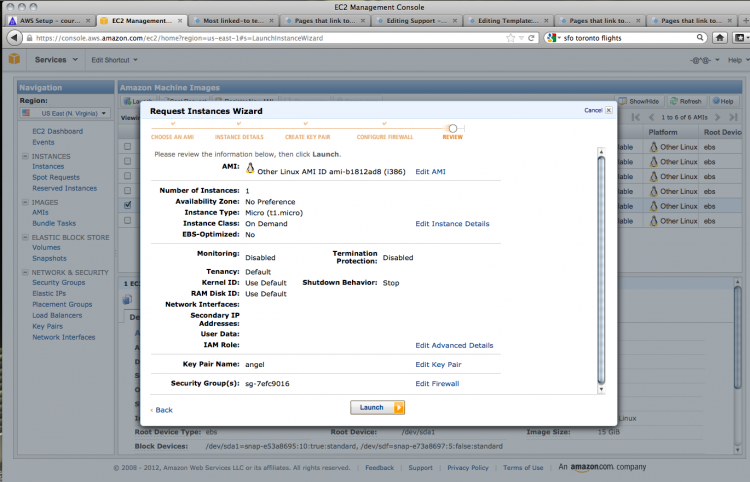
With the security settings done, we can check over our options; if all looks well, click launch!
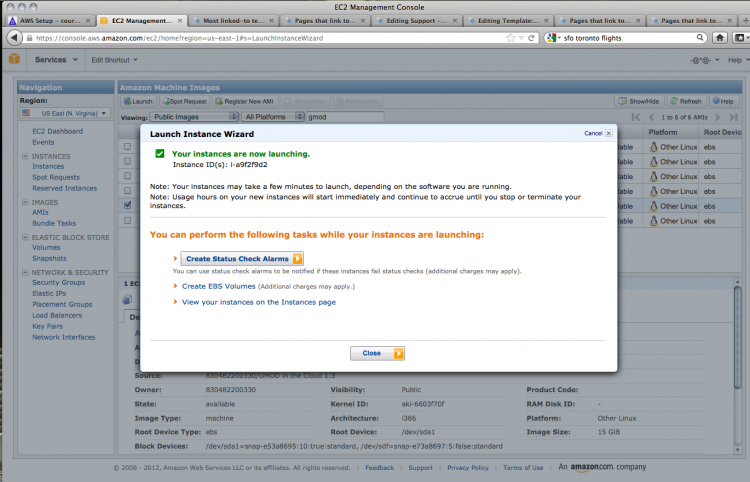
Houston, we have blast off!
